How to draw Ships
This is an extensive tutorial on how to draw ships, from different angles. Note that, it's still very simplistic, and it could get more difficult, depending on the boat type.
For this reason, I label this tutorial as:
Intermediate Level
Every ship you find you will see differences. The deck can be flat, crowded, more angular, or incredibly decorated, while veils can be found bigger, smaller, more or less in number, or even collected; but no ship looks like another.
To solve this, I didn't look at only one reference: I designed a new ship. This would allow me to add features at will, keeping it simple yet figuring out where everything tends to be placed in.
This tutorial is FREE, but you can support me on Patreon, if it was helpful.
I skipped the rendering part of painting, because we've talked about it in previous themes. Not much changes, while the main work here is on the lineart.
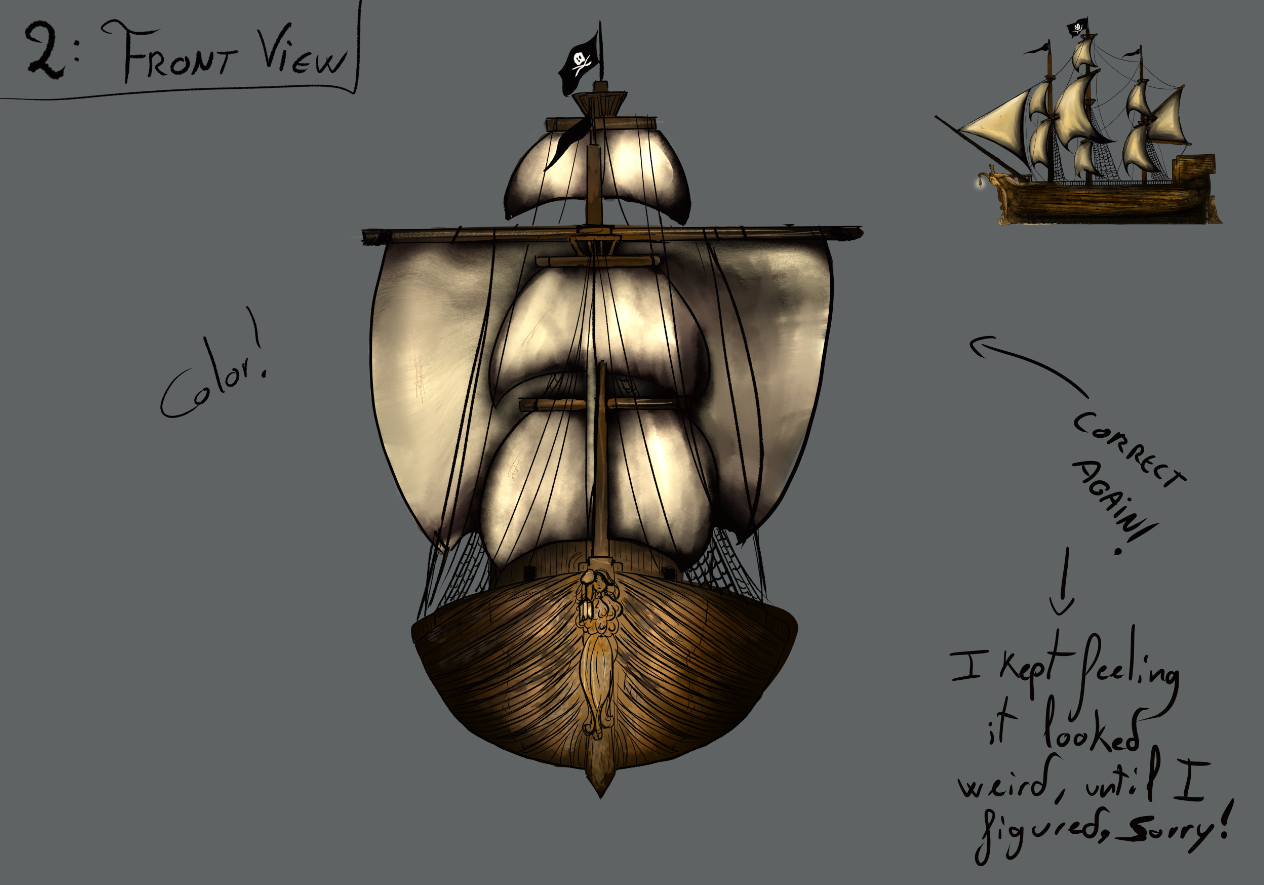
Disclaimer: On the second part, I was unaware of what looked wrong with the sketch, until I painted it. The veil should have been bigger, from the beginning. Apologies.
Table of Contents
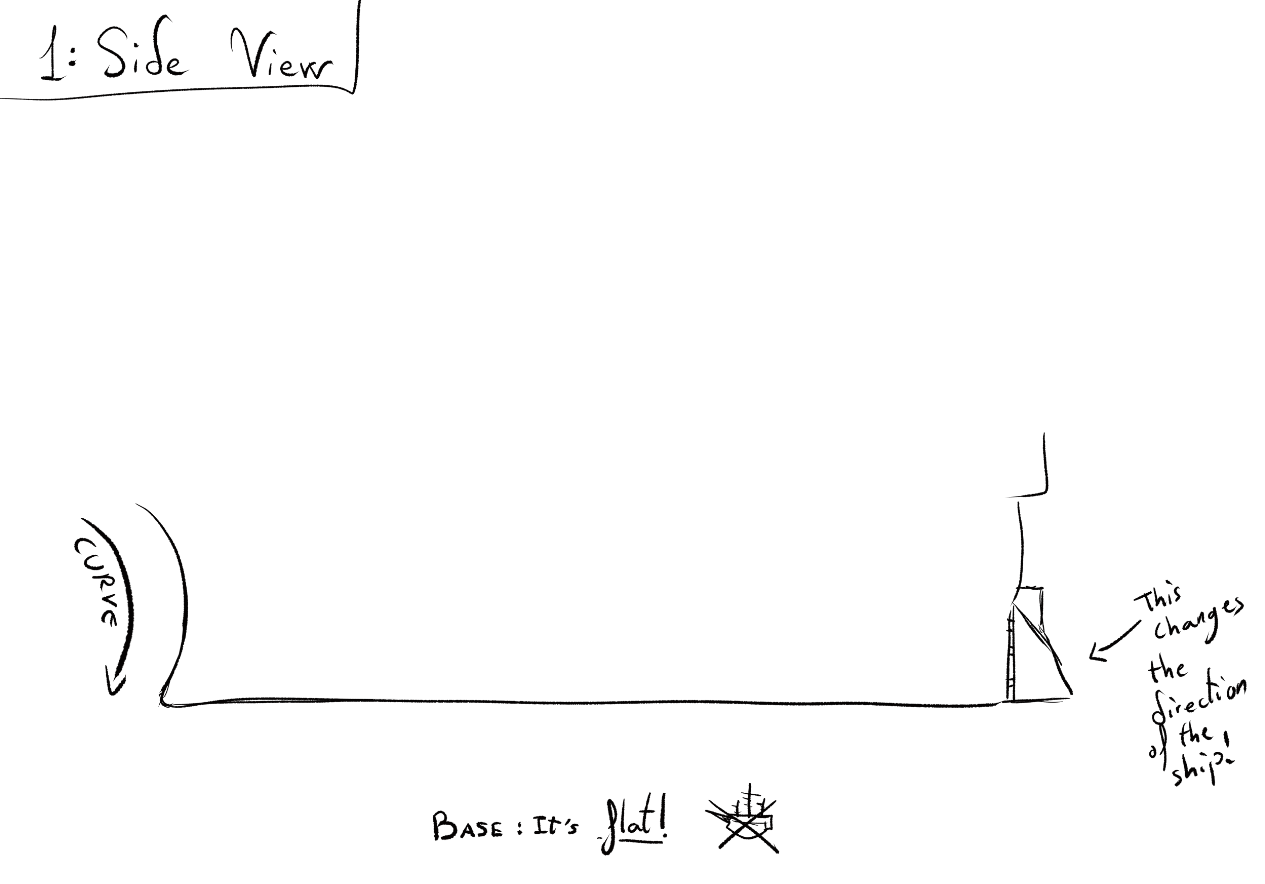
1. SIDE VIEW
Side views are often used to portray the essence of "ongoing travel", or, "approaching destiny", in a peaceful manner. The scenes display many important features of the ship, and often, the waves are gentle. Basically, it serves as a plain presentation, neither too simplistic nor too epic.
1.
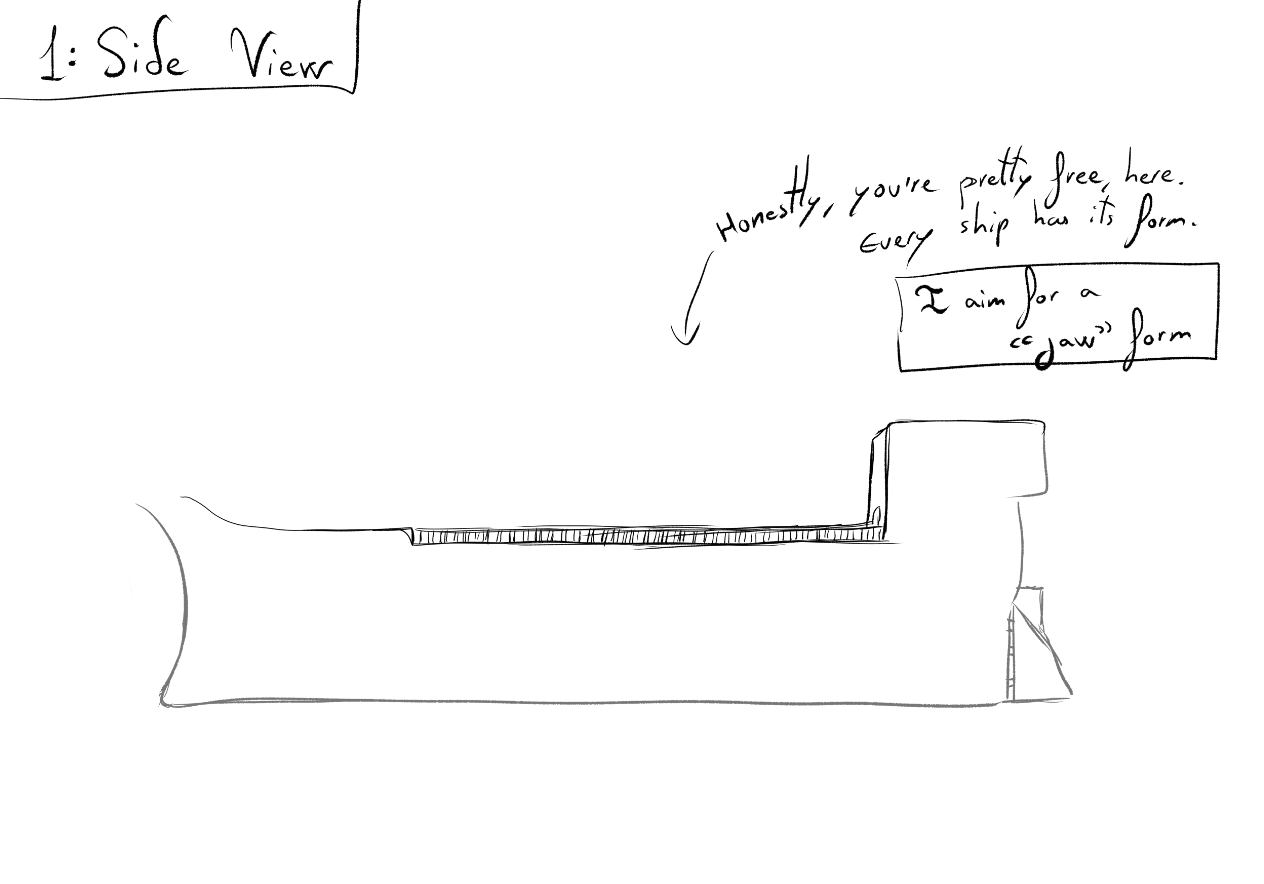
To begin with, draw a long, straight line, at the bottom. This will be the base of your ship. One could imagine the bottom of the boat having a slight curvature, because of buoyancy, but that's not correct, it's flat from front to back.
Then, you can delineate the front area, which is designed to break the waves, and therefore, it has an angle. The form depends on every boat's design: some have a curve, some are straight.
For the back area, draw a straight line, and feel free to break it at the top, if your design allows it. However, at the bottom, you shall not forget the rudder, as it's what allows the boat to turn.
2.
For the top of the base, you are quite free to add rooms or to leave the deck naked. In my design, I used a common form between the ungulates' jaws as inspiration: You can distinguish the teeth area, as well as where the jaw connects to the skull -doesn't need to be realistic, as long as the design reaches the idea.
3.
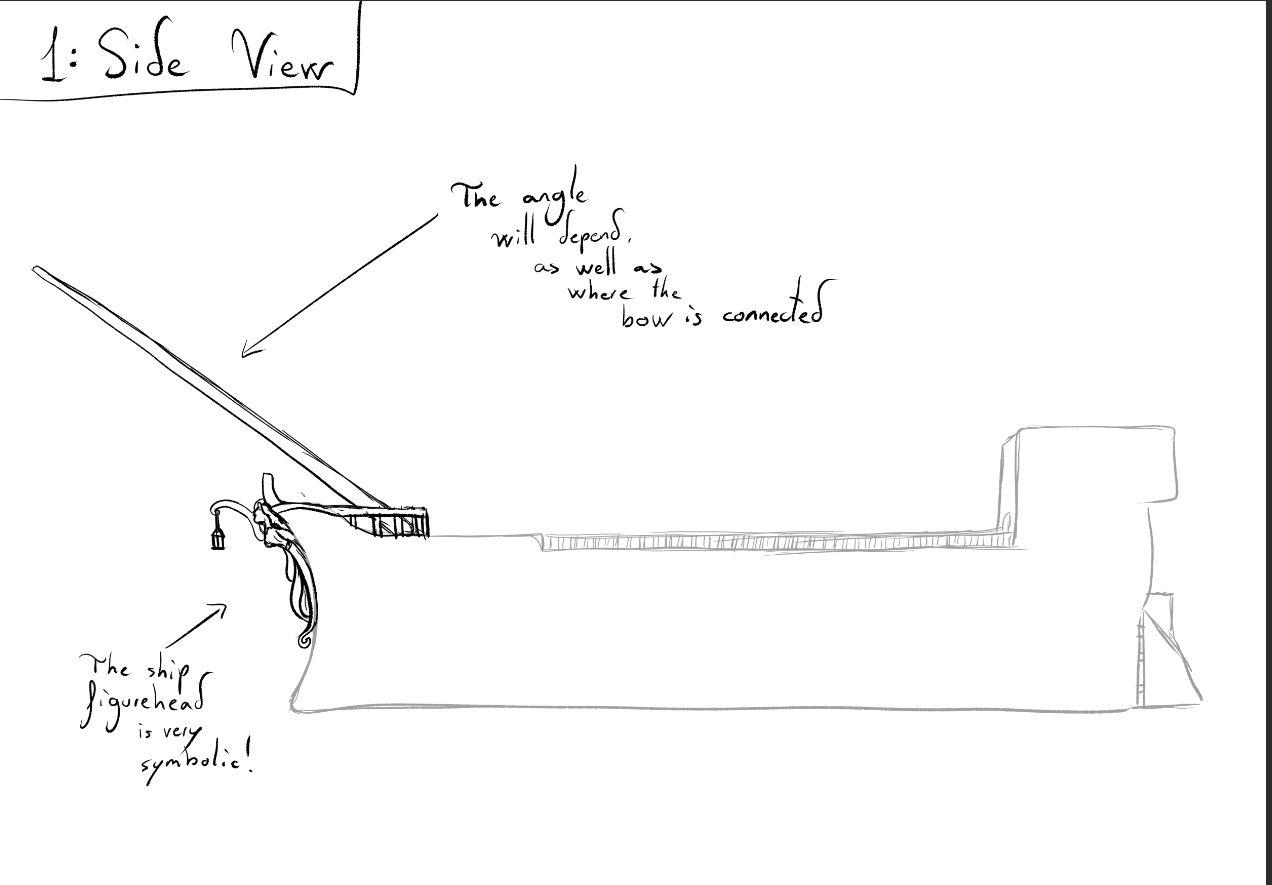
The front piece is very important: it tells about the ship, and it serves as more than "wind breaker". Many times, it holds a lantern, while others it simply becomes a symbol. Therefore, for your ship, think carefully what symbolism you aim to add.
As for the bow, above the figure, the angle may vary, although it's worth mentioning that its base is thicker than the end, most of times -weight is an important factor-.
4.
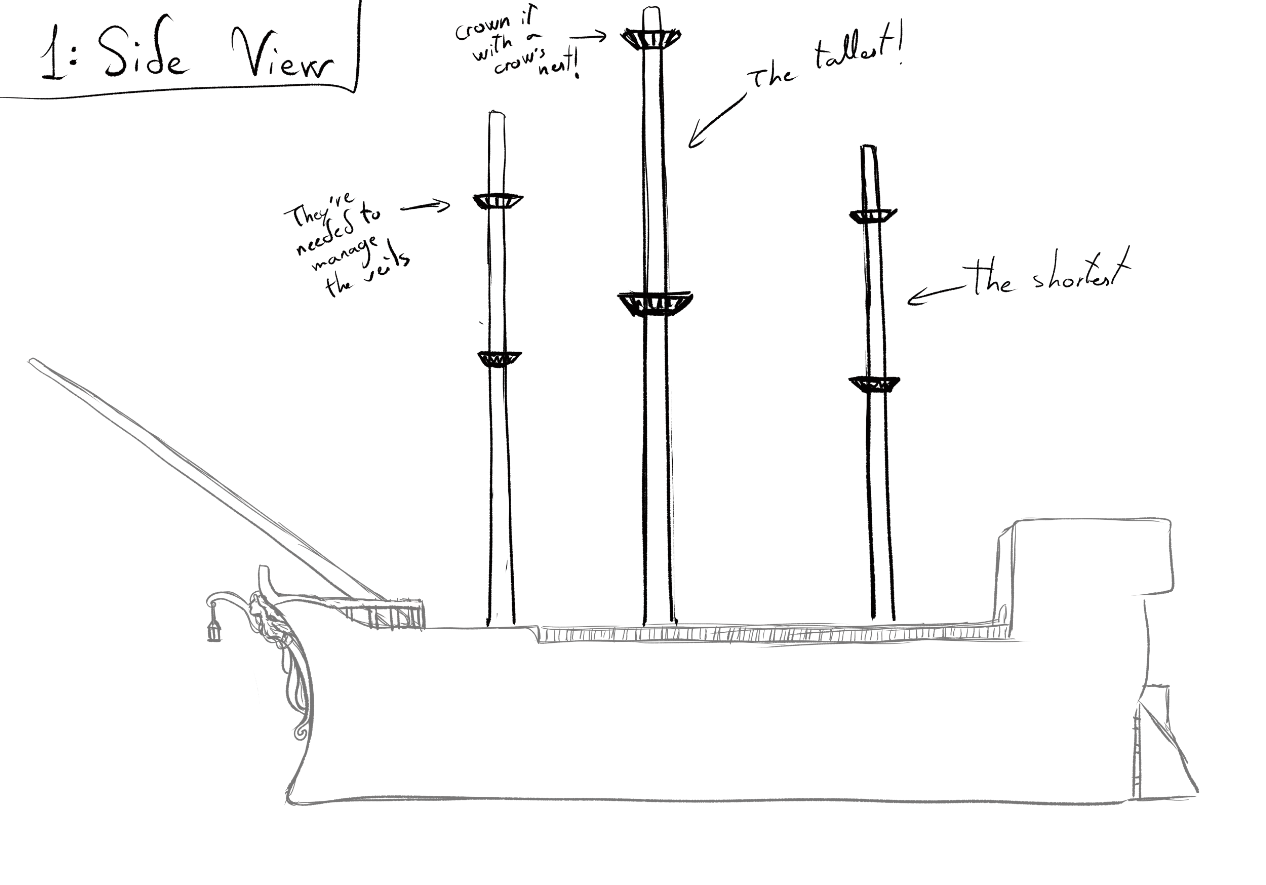
Moving to the masts, it's important to mention that so many differences can be all great choices, from number and sizes of the veils, to the amount of masts. To keep it simple, I added 3 masts, with the middle one being the tallest, and the one in the back being the shortest. Each one will need a "basket" somewhere close, for easy usage of ropes and storage.
5.
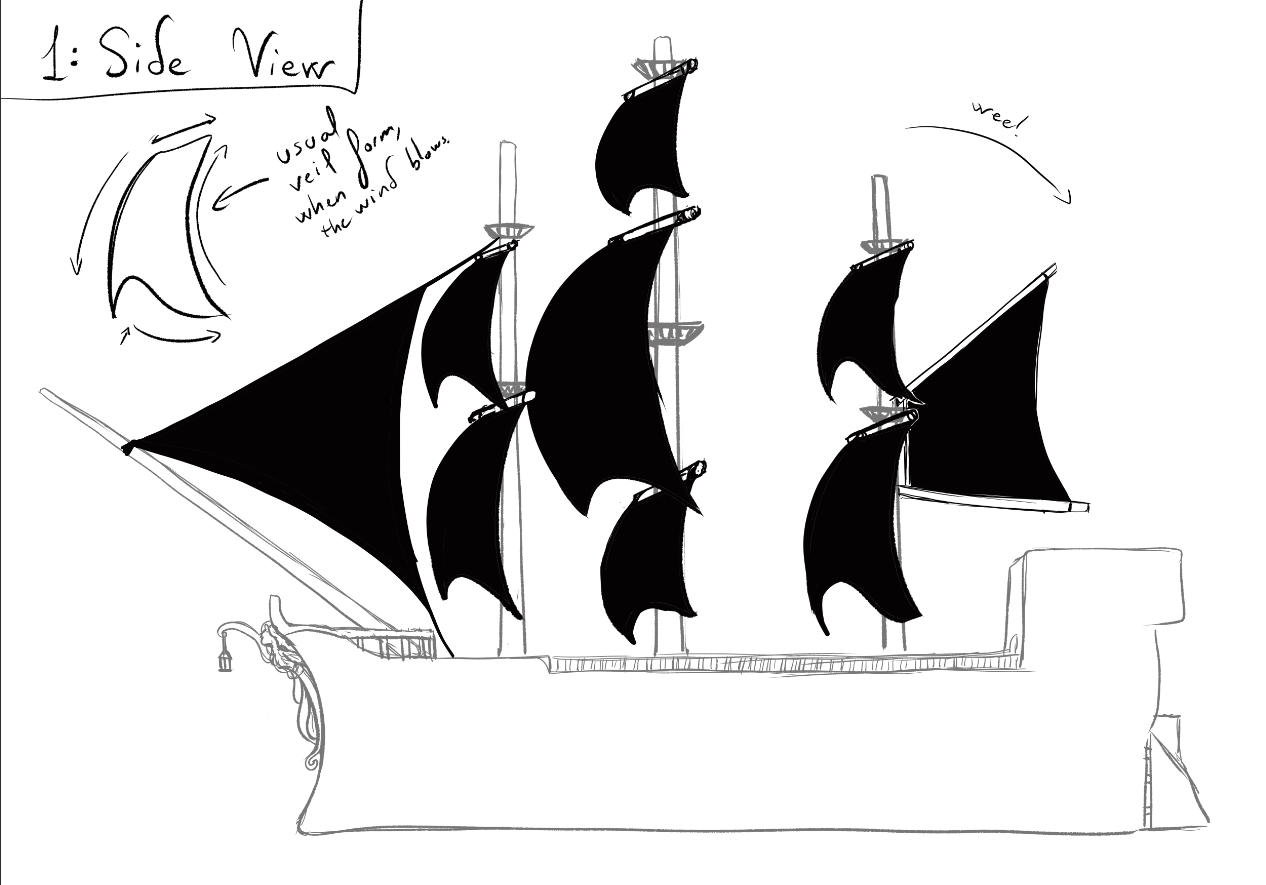
The veils billow from the wind blowing, so, the stronger the wind, the more they will curve. However, for your painting, you must be aware of how weather is going to affect, and if at certain points, the veils should be collected.
Now, if they are flowing free, you must remember that several ropes will be tying them, which obligates each veil to have a limit of placement. For example, the biggest one, in the middle mast, will have a big curvature, but the bottom should be angled close to the mast, and no more to the back.
The horizontal post holding them up will set a straight line, while the other sides will be curved.
Two different veils, one at the front, triangular, and one at the back, kind of a trapezoid, will be in charge of the sailing direction.
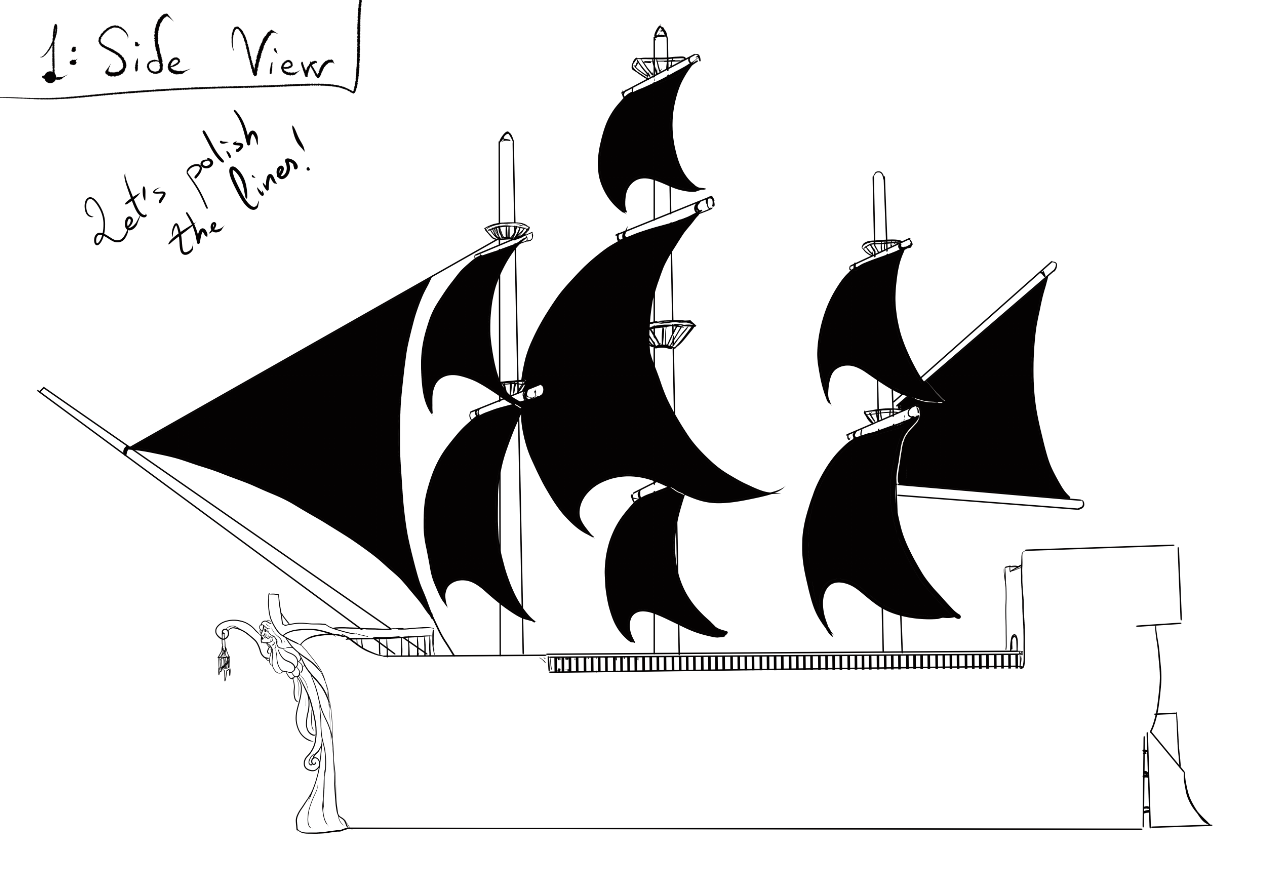
6.
Now that the main sketch is done, you may polish the lines, before continuing further details. Straighten the lines, for clarity.
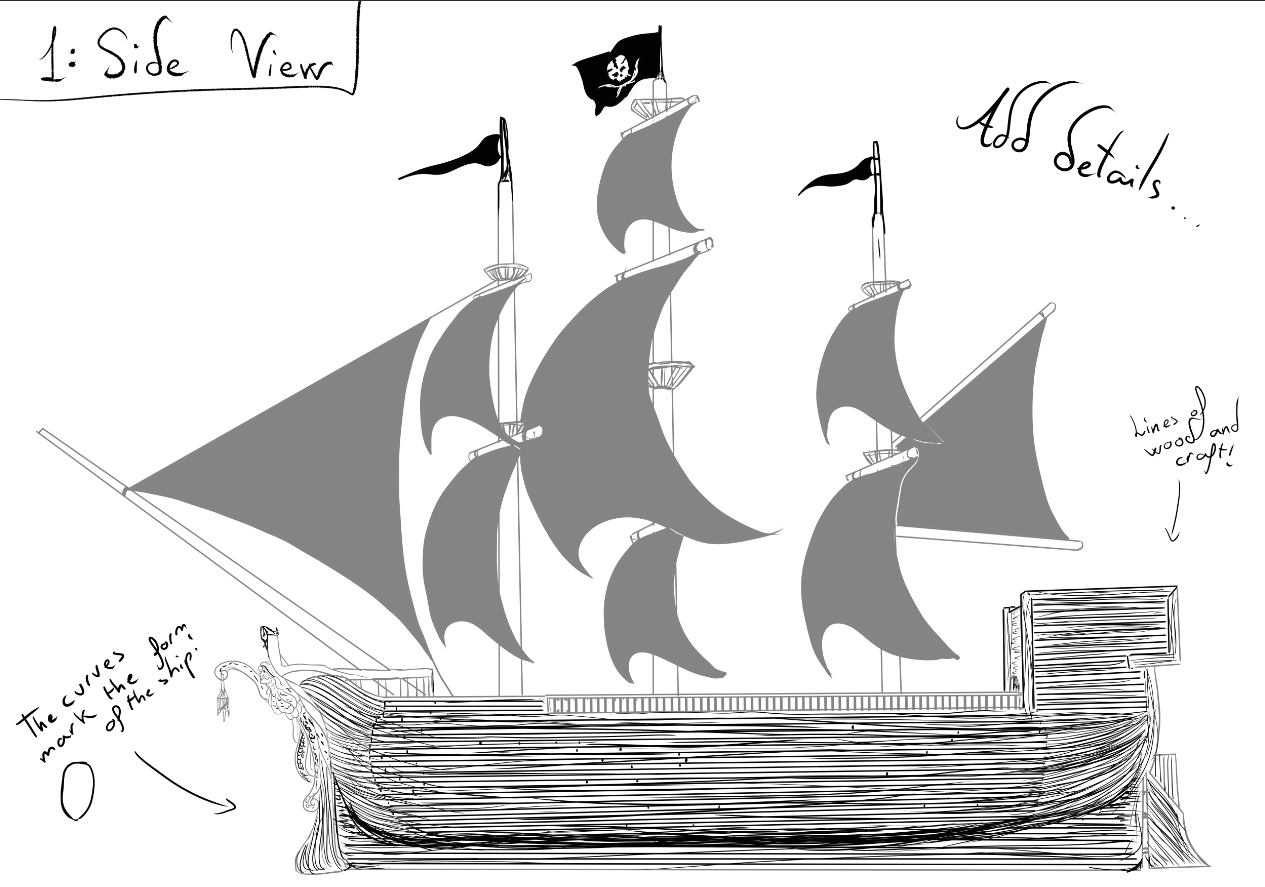
7.
To add texture, draw horizontal lines across the boat. They can alternate between straight lines and "random" ones, making the wood look more realistic. Curve them slightly at the bottom, to add depth, but leave the bottom below with straight lines, again.
On the masts, whether you fancy Jolly Rogers, or if it's an expedition ship, don't forget to add the banners of who the crew serves to.
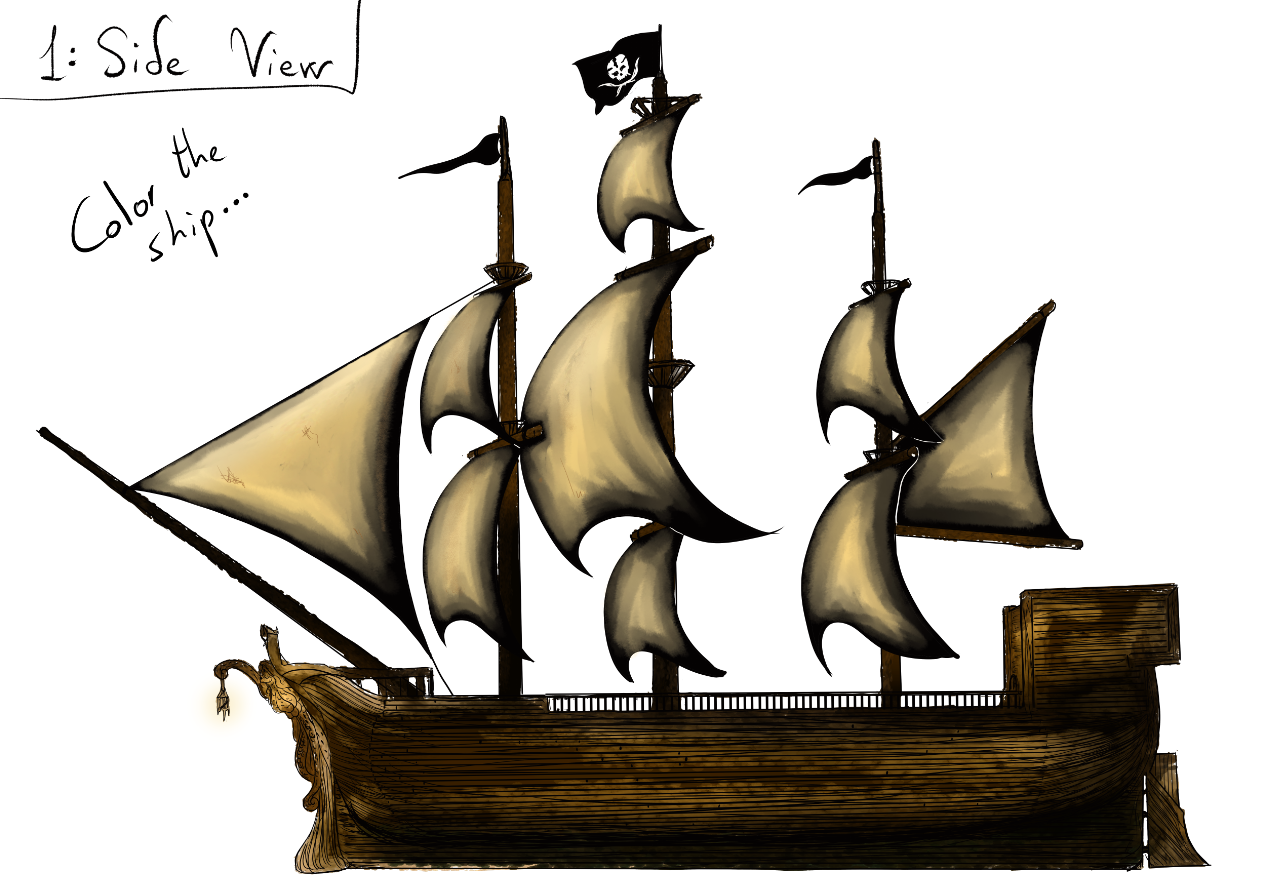
8.
Color the ship, if needed, making sure that all the materials are portrayed accordingly:
- New wood and old wood look different.
- Barnacles are a nice touch on old, abandoned boats.
- The veils get dirty, and sometimes they need to be sewn up, and not all sailors will have the same level of skill (sometimes it's a punishment, sometimes it's an expert aboard, depending on the story).
9.
To finish the side view, add the ropes connecting veils and deck. Some ships have an extreme amount of them, others are more simplistic. You decide which range to use, but take into account that the number of veils is related to that.
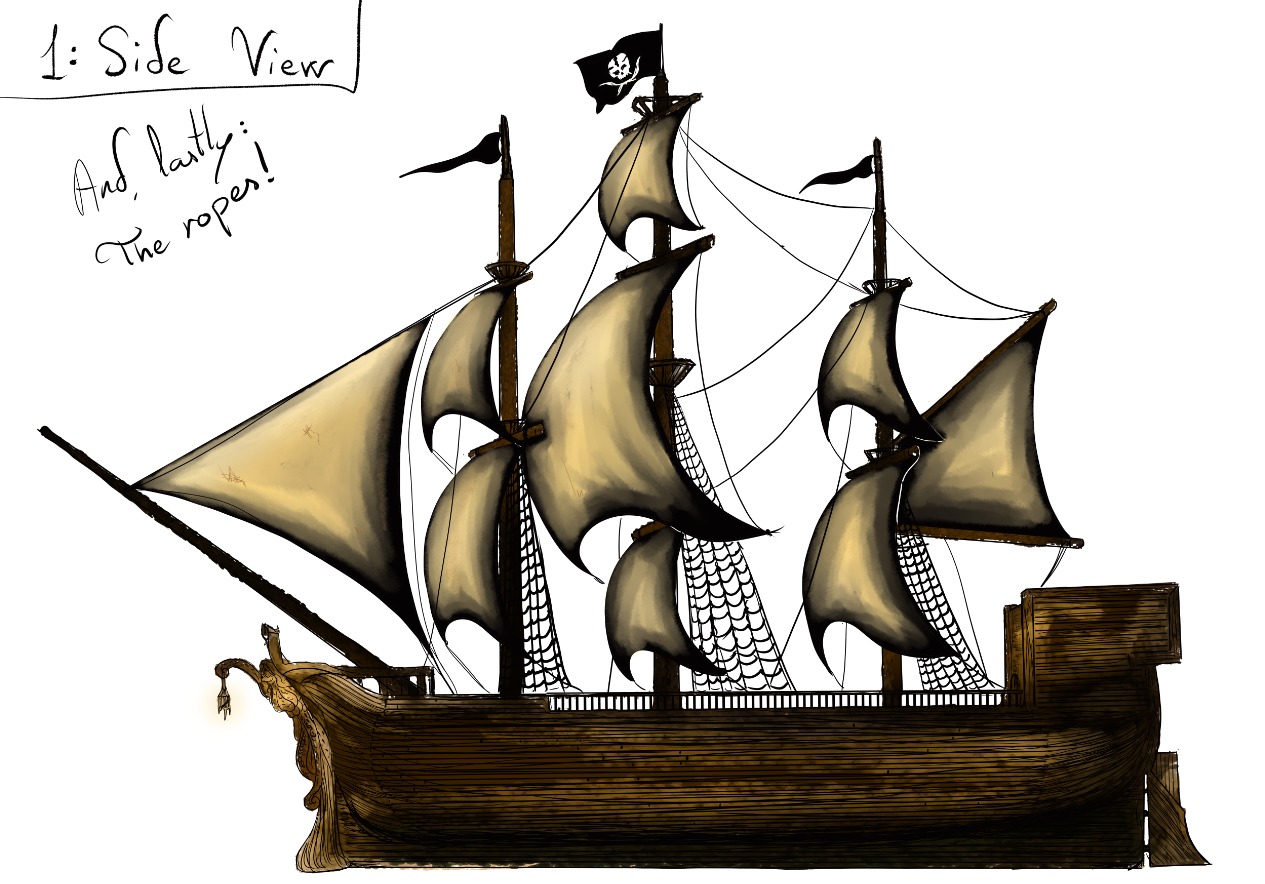
Here's the result:
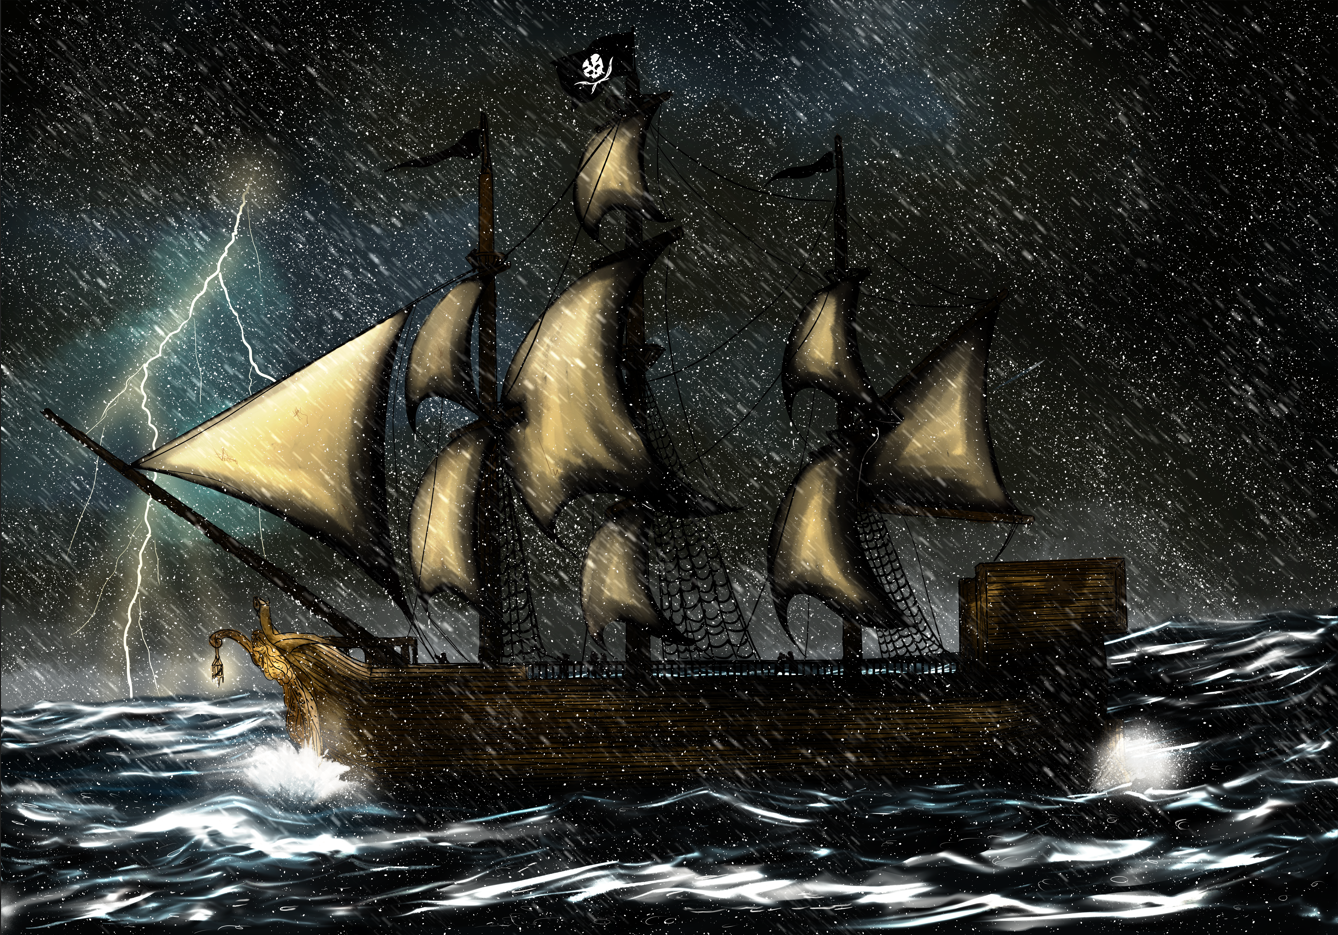
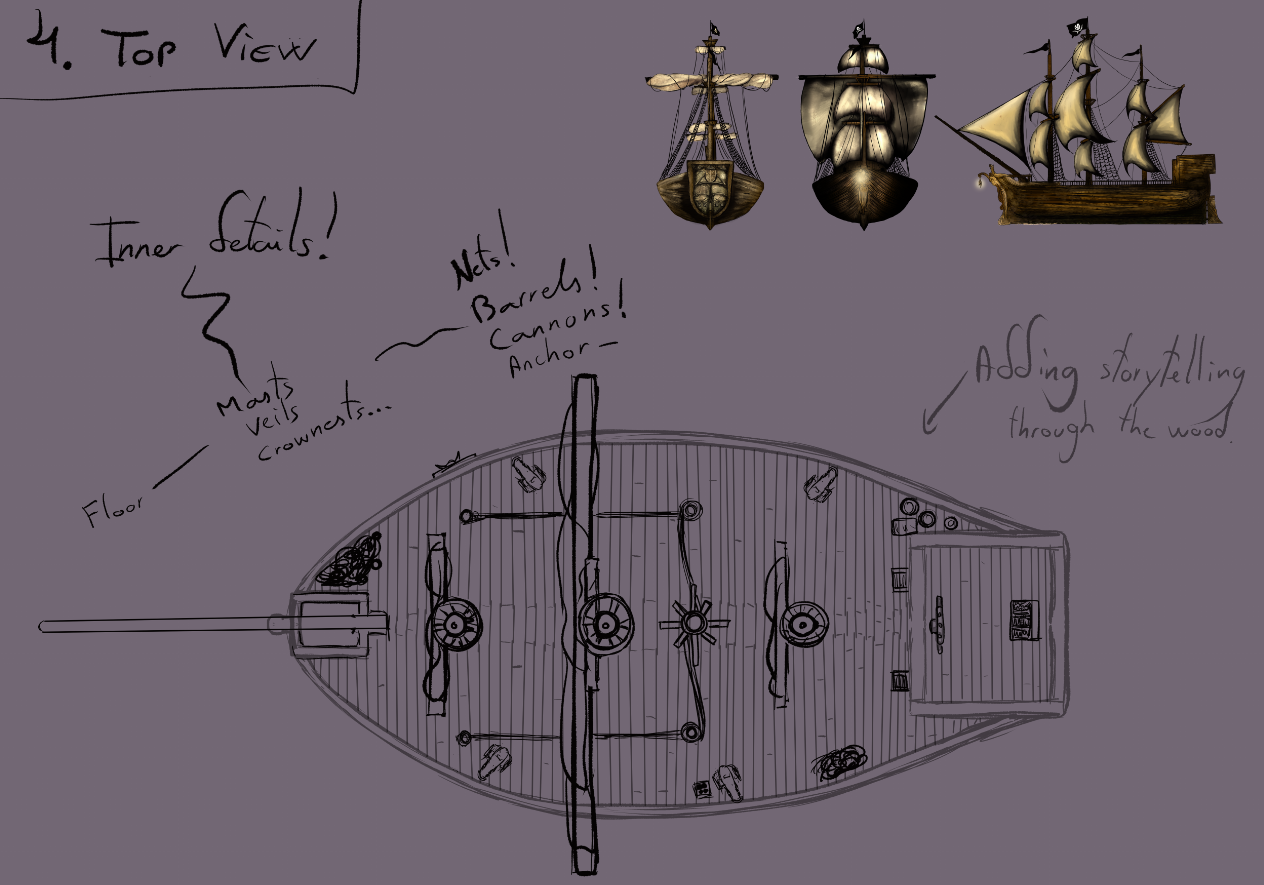
2. FRONT VIEW
The front view can be very tricky, because it could make the boat look too simple. This point of view can be used to portay "on the way", and determination.
The masts can overlap enough so the one(s) at the back end up invisible, thus making the biggest veil become the main character... And here's the reason why I struggled with my own painting, on this very tutorial.
Before you correct me, yes, the main trait of the front view should be the front piece. However, it's the veil what you'll notice first, since it's the "bigger picture". Having said that, it could be different, if the point of view forces a deeper perspective.
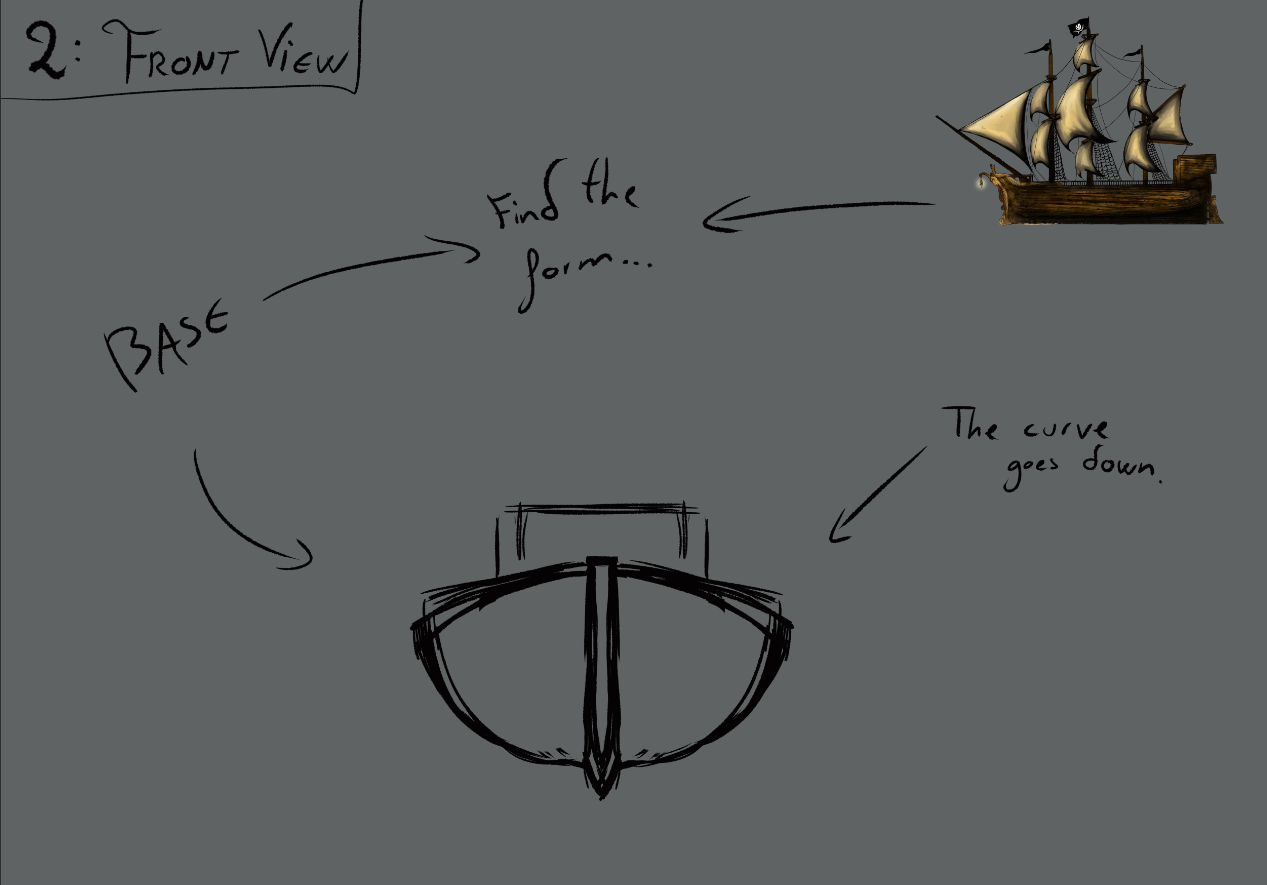
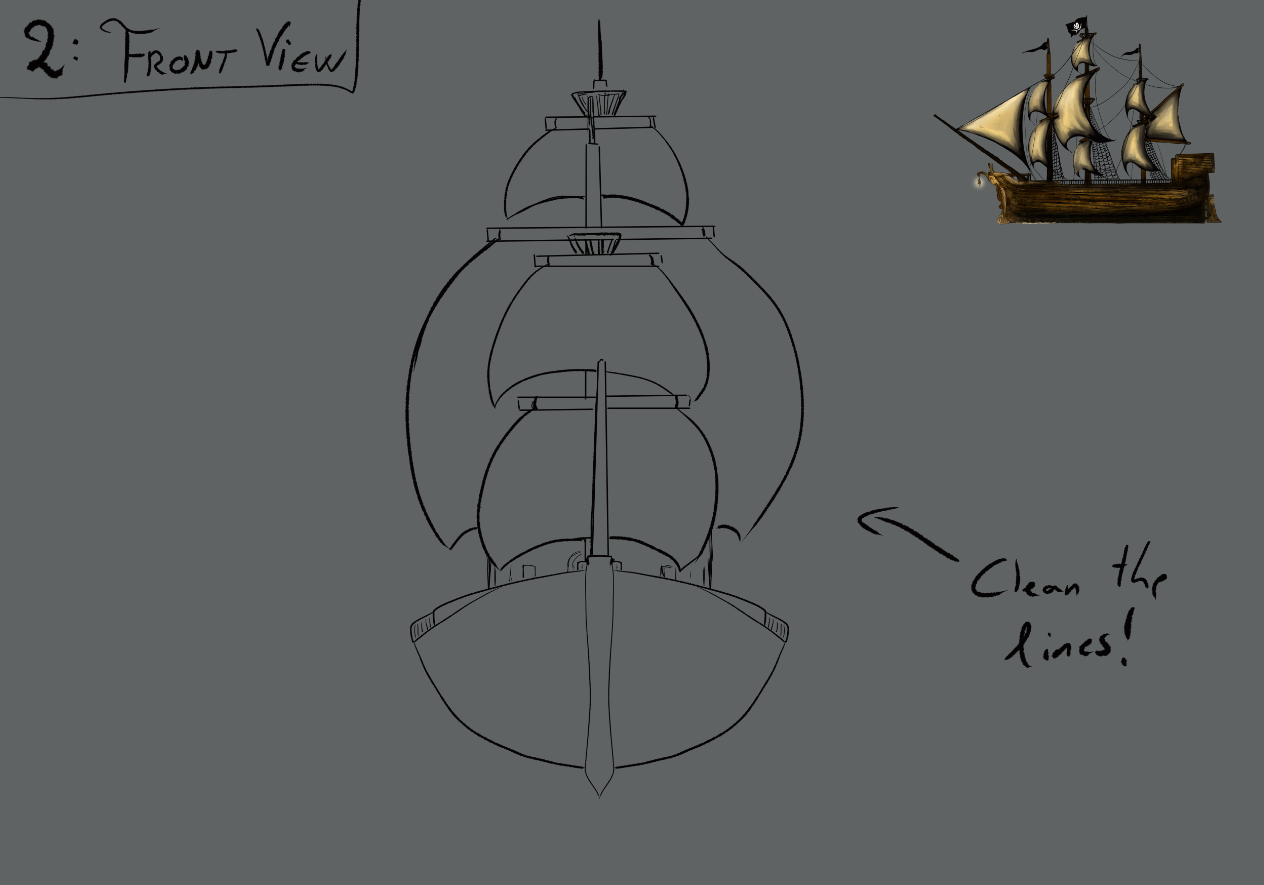
1.
To begin a raw sketch, draw a vertical rectangle, and add a little ending pointing down. On both sides of the rectangle's end, draw an upwards curved line, which will set the width of the boat. Close the areas with a less curved line, downwards, on top, connecting both. You may sketch other parts of the base, in very little detail.
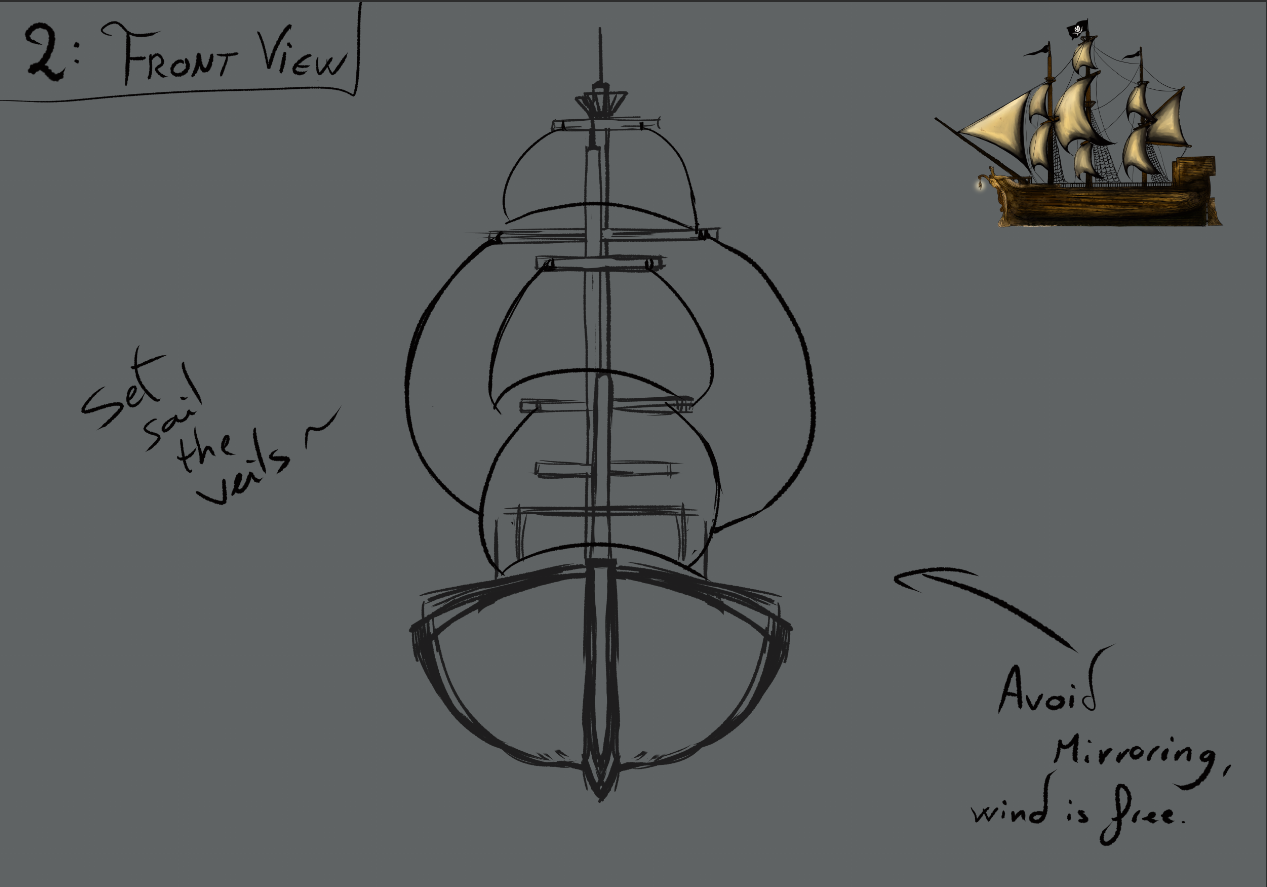
2.
The masts will raise from the center, and, even if it's full frontal view, it's not recommended to have them overlap each other. Leaving a slight asymmetry can help with depth. Same with the horizontal lines of the veil (yards), they will look more interesting if they don't directly overlap each other.
In the following steps, I made the mistake of drawing the largest veil's yard way too short.

3.
For the veils, it's recommendable to avoid straight lines, if the ship is sailing. Instead, they "inflate", making them adopt a trapezoid form, in which all sides except the top are curved. Depending on how well tied or loose, as well as the strength of the wind, the bottom will appear wider or the same size as the top, yet the widest part will often be between the central area and the bottom.
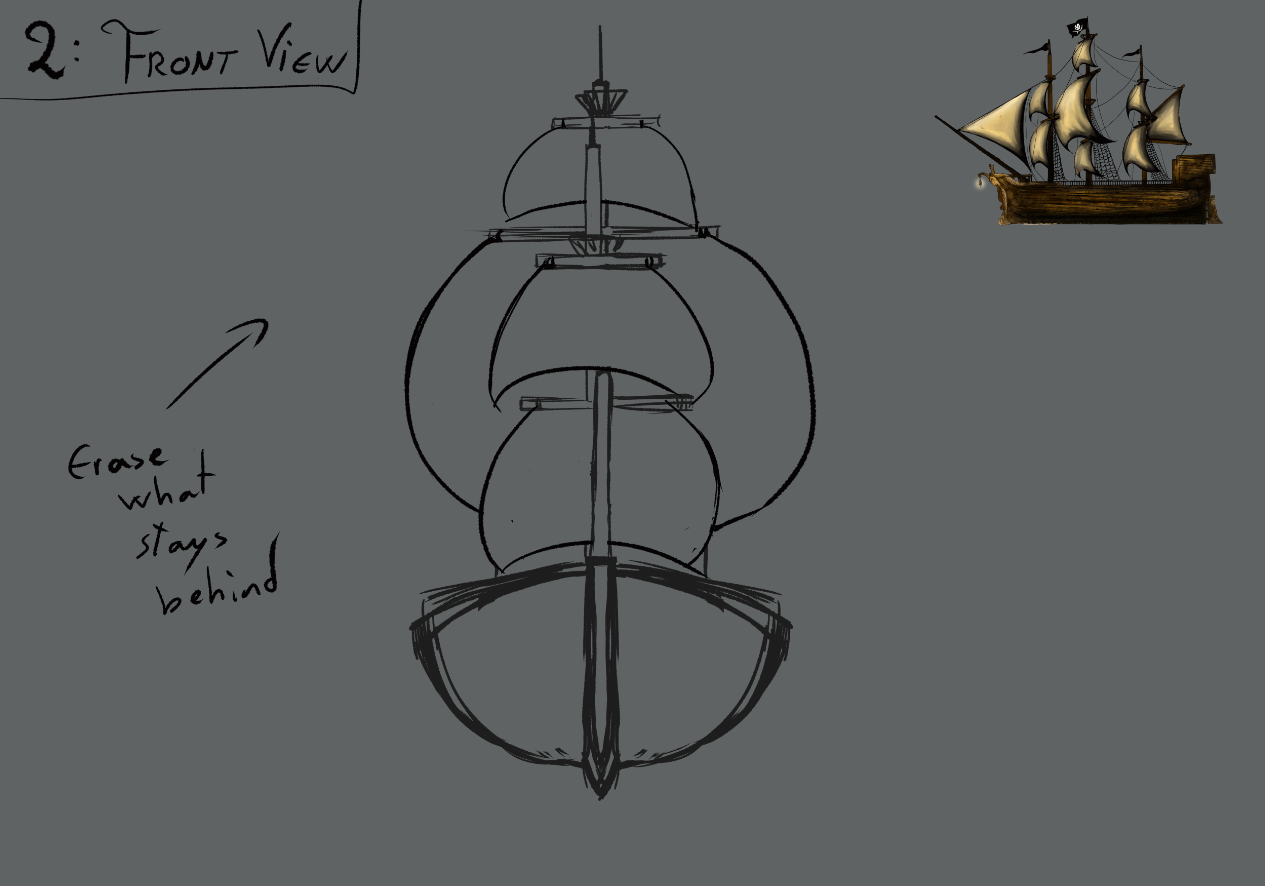
4.
Erase what should stay behind the veils, and make any changes, if needed.
5.
Time to polish the lines, and to make sure everything makes sense. The first sketch is done.
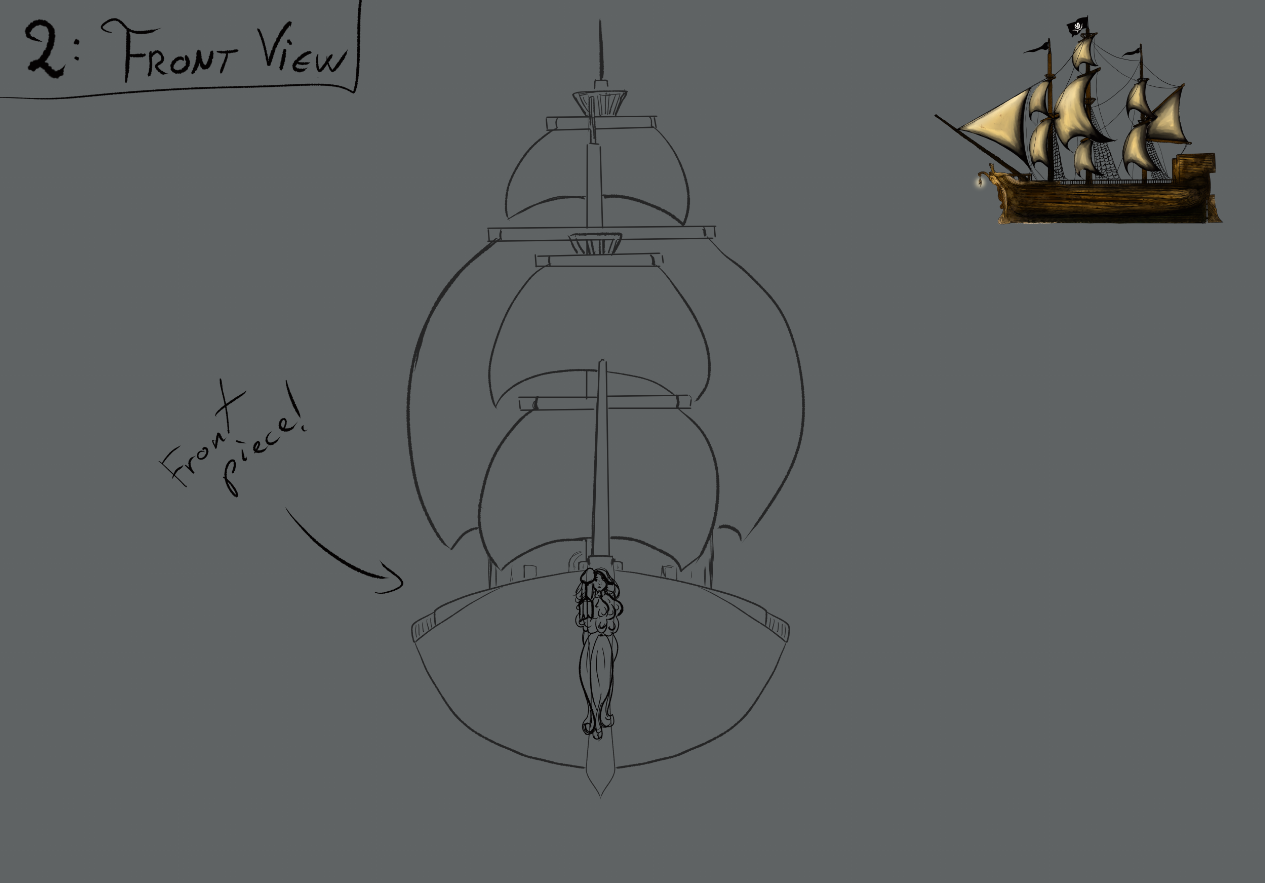
6.
The figure at the front would be the most intricate part of this view, therefore it needs thin lines, and to look straight forward. If it's holding a lantern, adding the light is not necessary on this step.
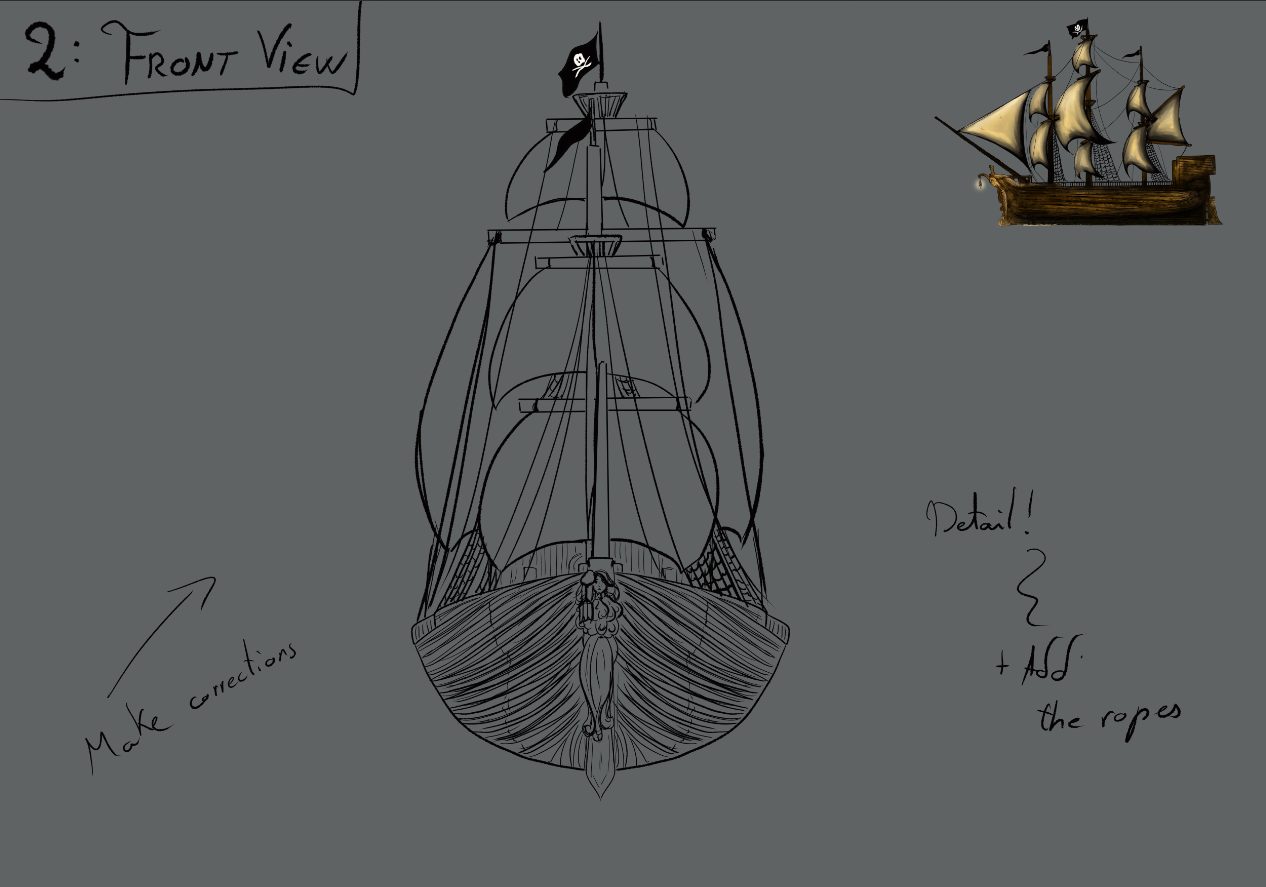
7.
Make adjustments, and add the ropes. This time, they can be added before painting, because some of them will be hid behind the veils.
Besides, you can also add texture on the base.
8.
Time to paint the ship. Take into account that curves have cast shadows, and the light source will mark the difference.
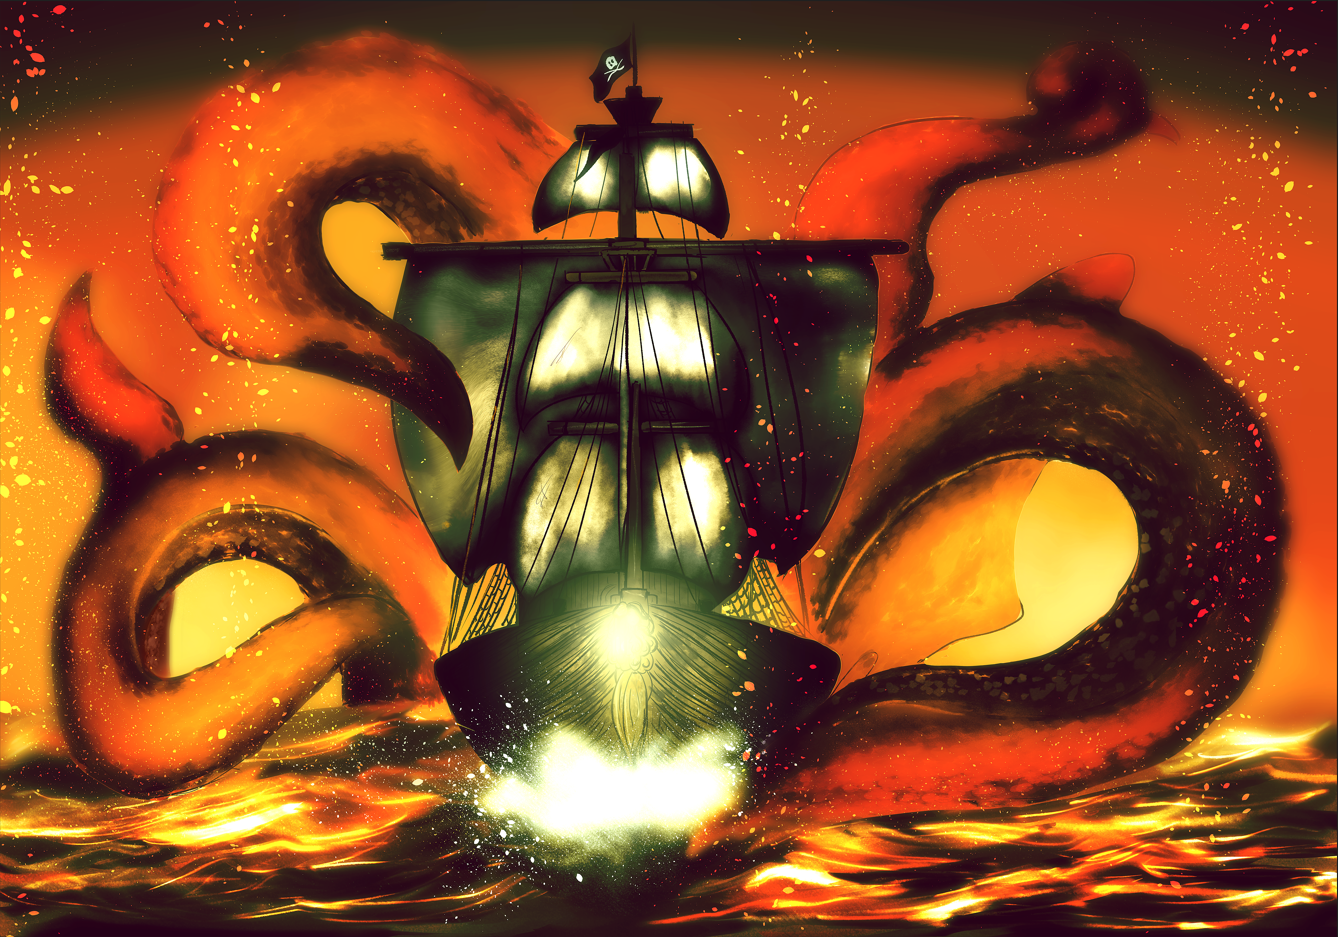
3. BACK VIEW
This one is often used as a peaceful leaving, or a symbolic way to portray an open ending, as it leaves the viewer behind.
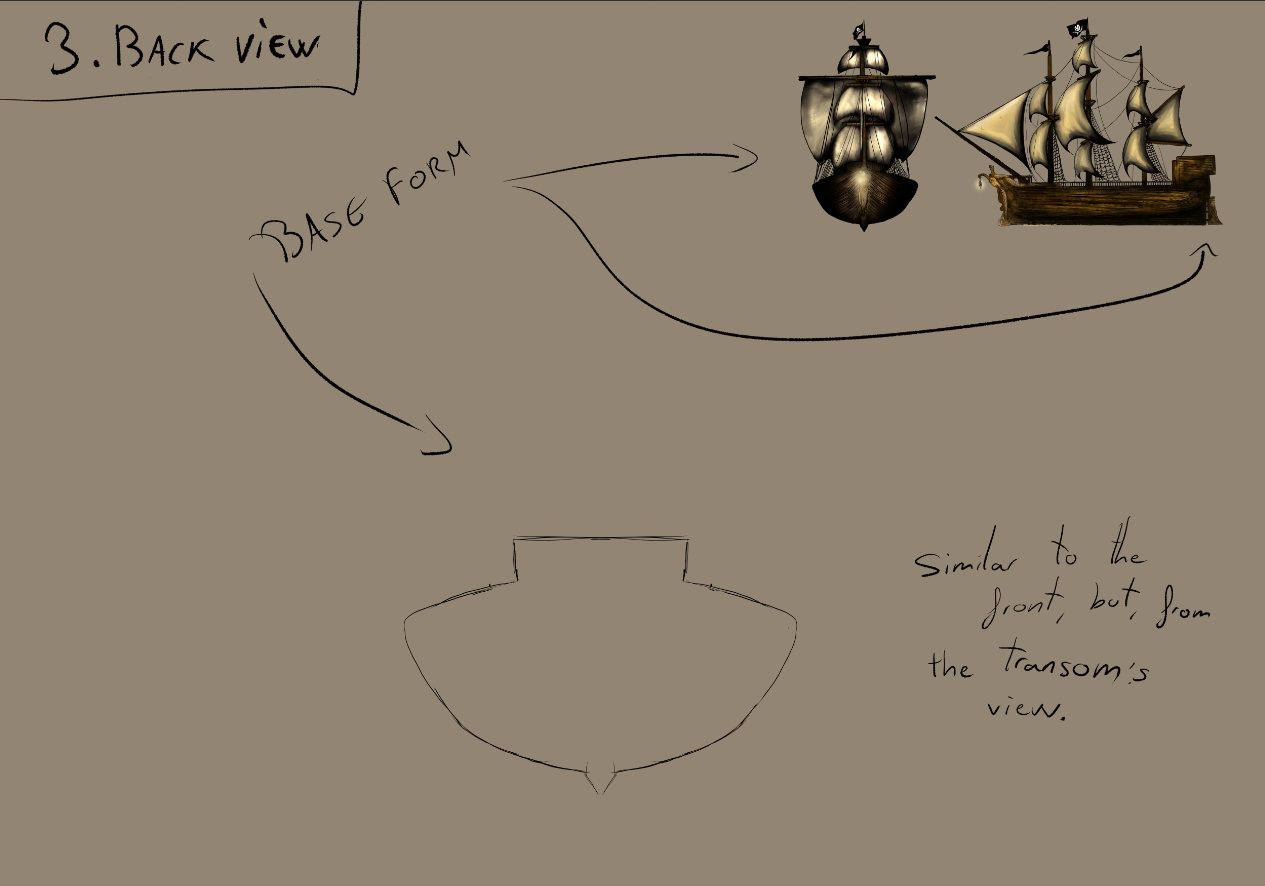
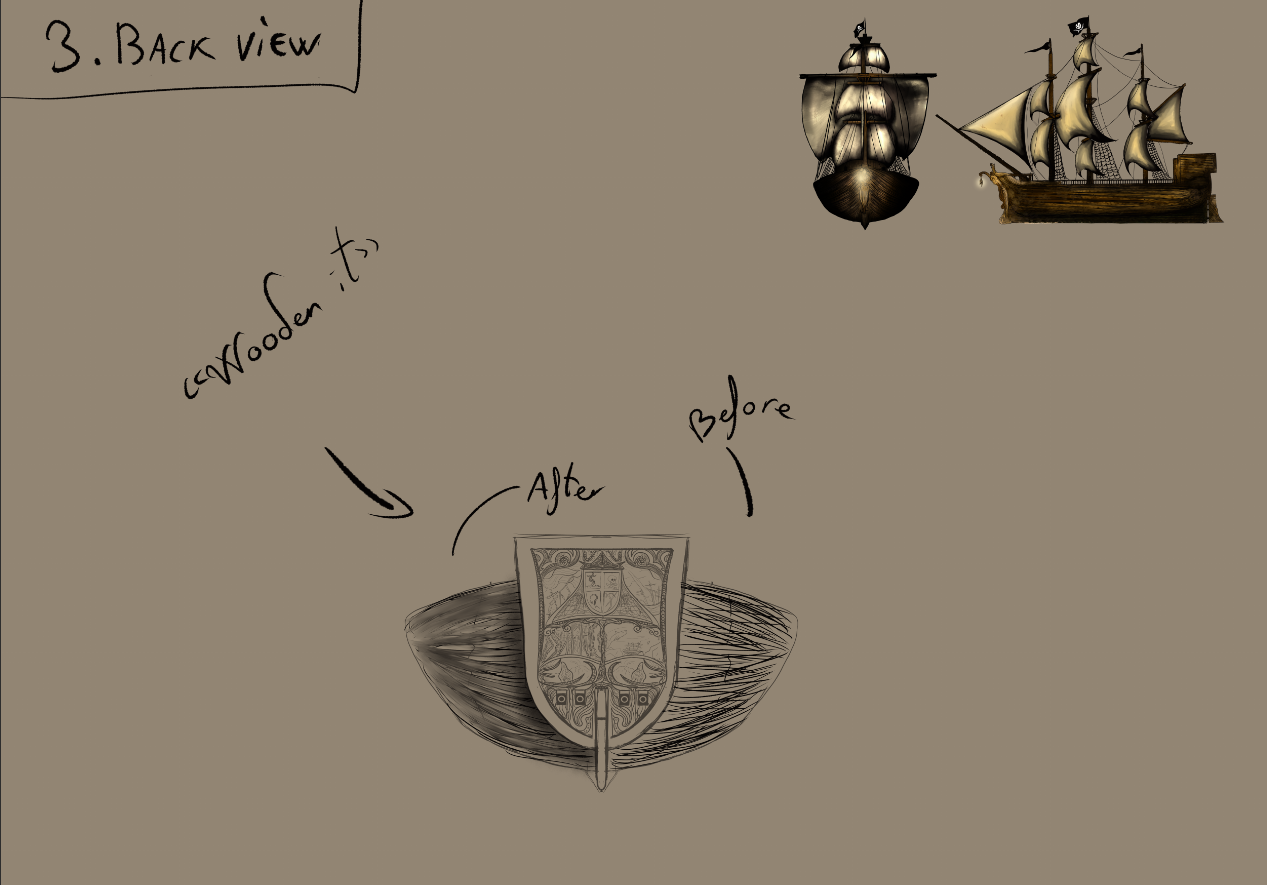
1.
Just like the front view, the base will be sketched similarly, with the difference that, this time, the highest points will be the full silhouette.
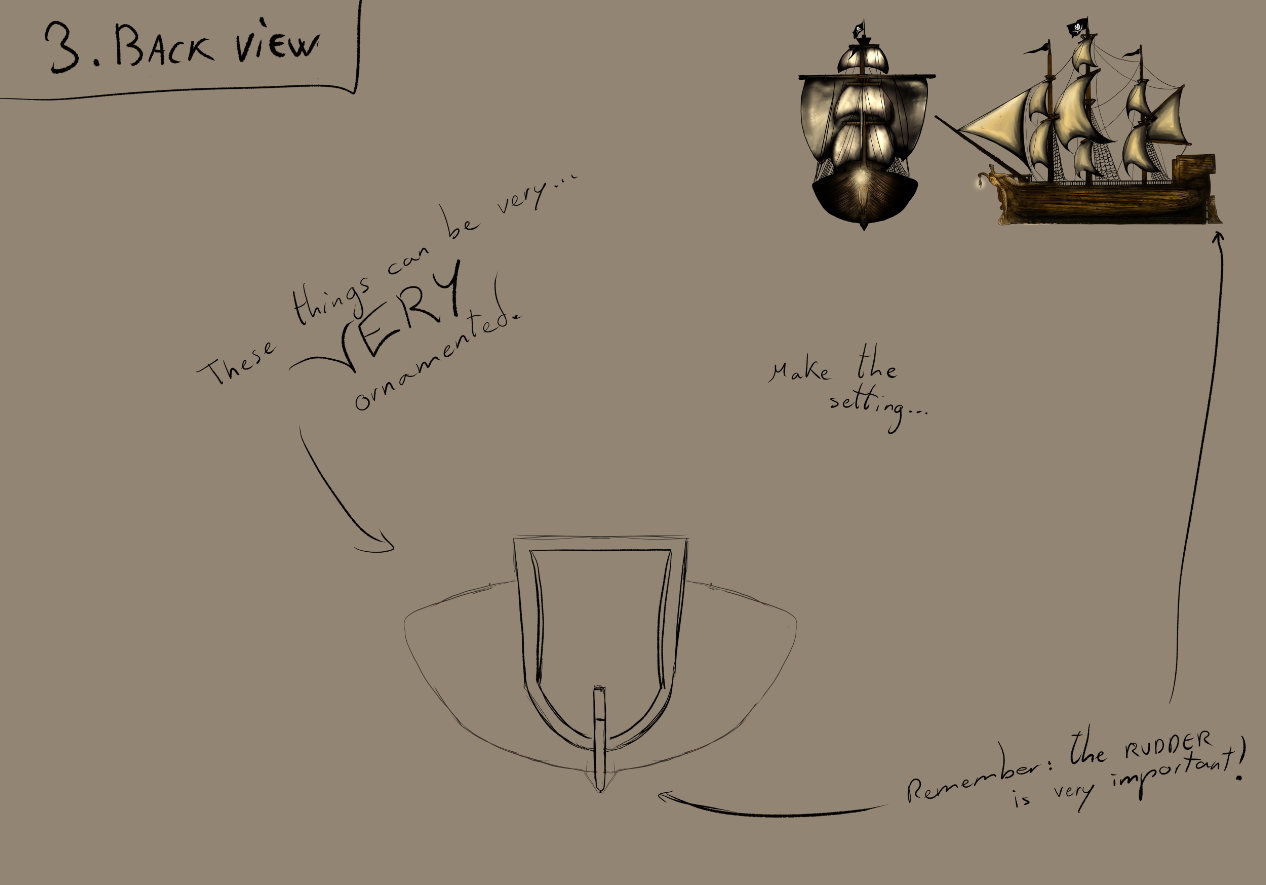
2.
At the middle, below, the rudder is placed. If looking straight, it should be no more than a very thin couple of rectangles, reaching the lowest point of the boat.
You can also prepare the area in which the ornaments will take over. Keep in mind, there are ships with ornaments everywhere, but for this tutorial I'll keep it at the very lowest amount.
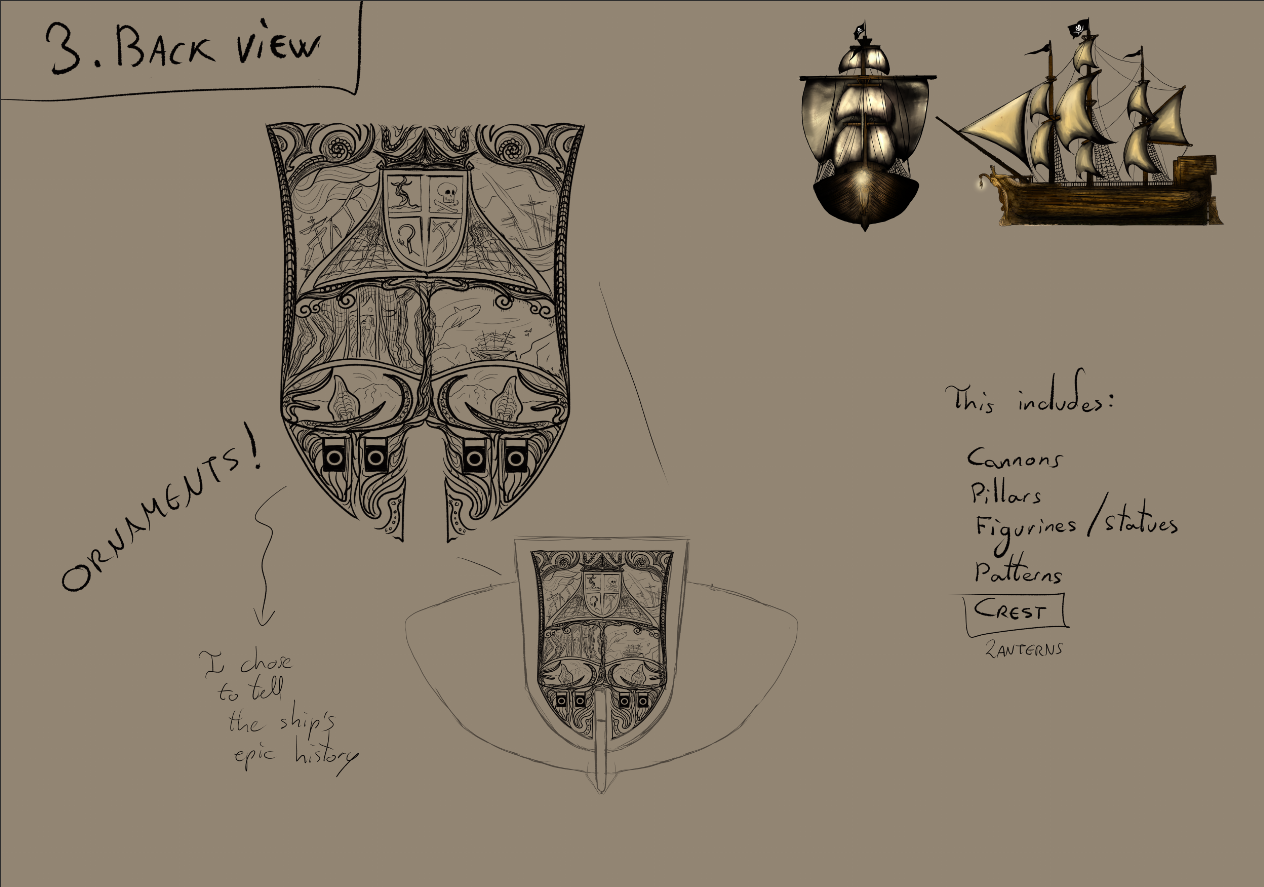
3.
When detailing, the choice of relevance is equally important to the story of the ship: *why is that particular figure portrayed, and why couldn't there be a better fit*. Don't forget, many times they hosted their crest. This already includes any possible past such ship or captain could have: if it was stolen, the decorations may still be references to the previous owner, and who knows, maybe the new one made some silly changes.
Either way, all the ornaments need attention, and thin lines. Lanterns and cannons are usual additions.
4.
Once finished, you can add texture of wood, and retouch it as necessary.
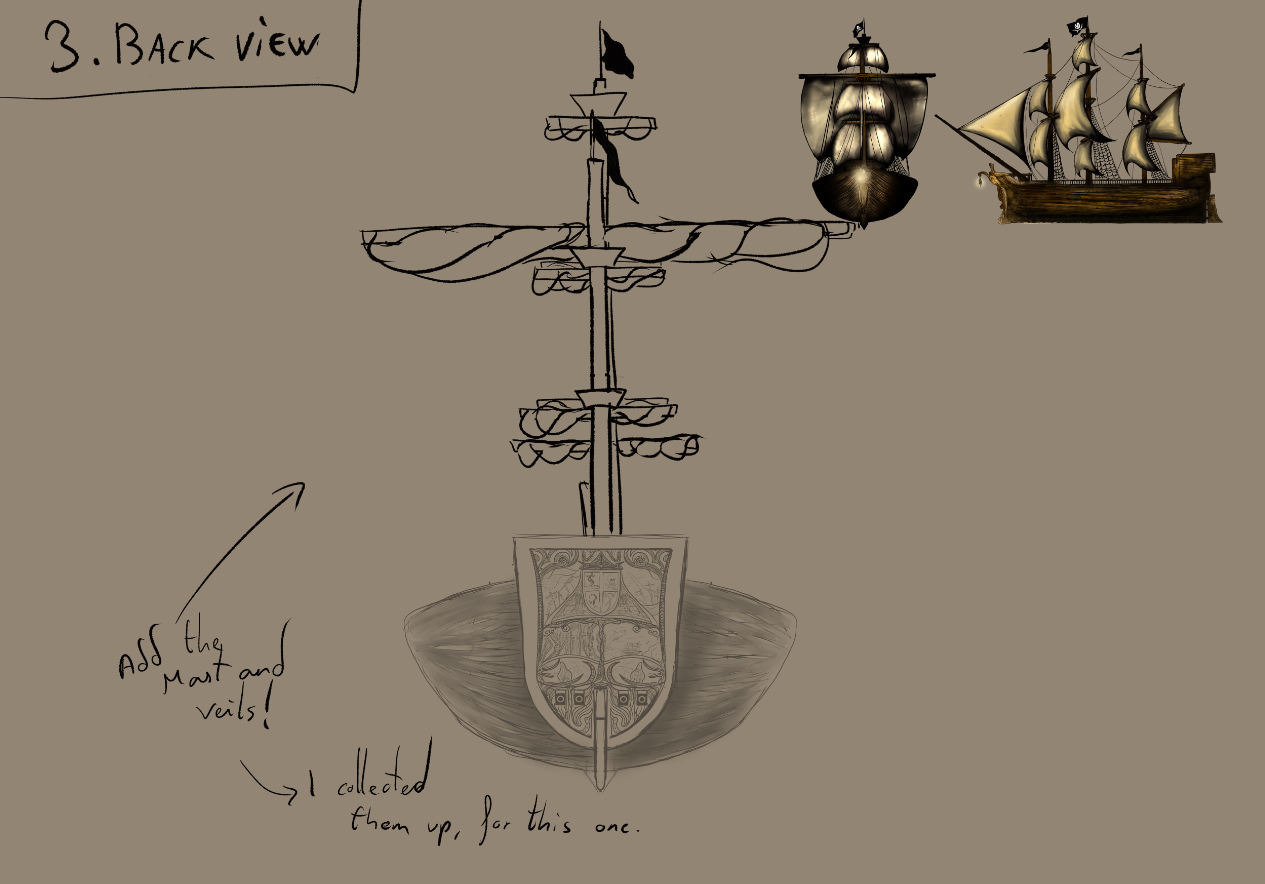
5.
This time, we will keep the veils collected. This means, it will barely be any different from Step 2- Front view, only with some cloth wrapping the yards.
If you were to leave them uncollected, it would be like the front view, with the difference that the masts would be visible behind them.
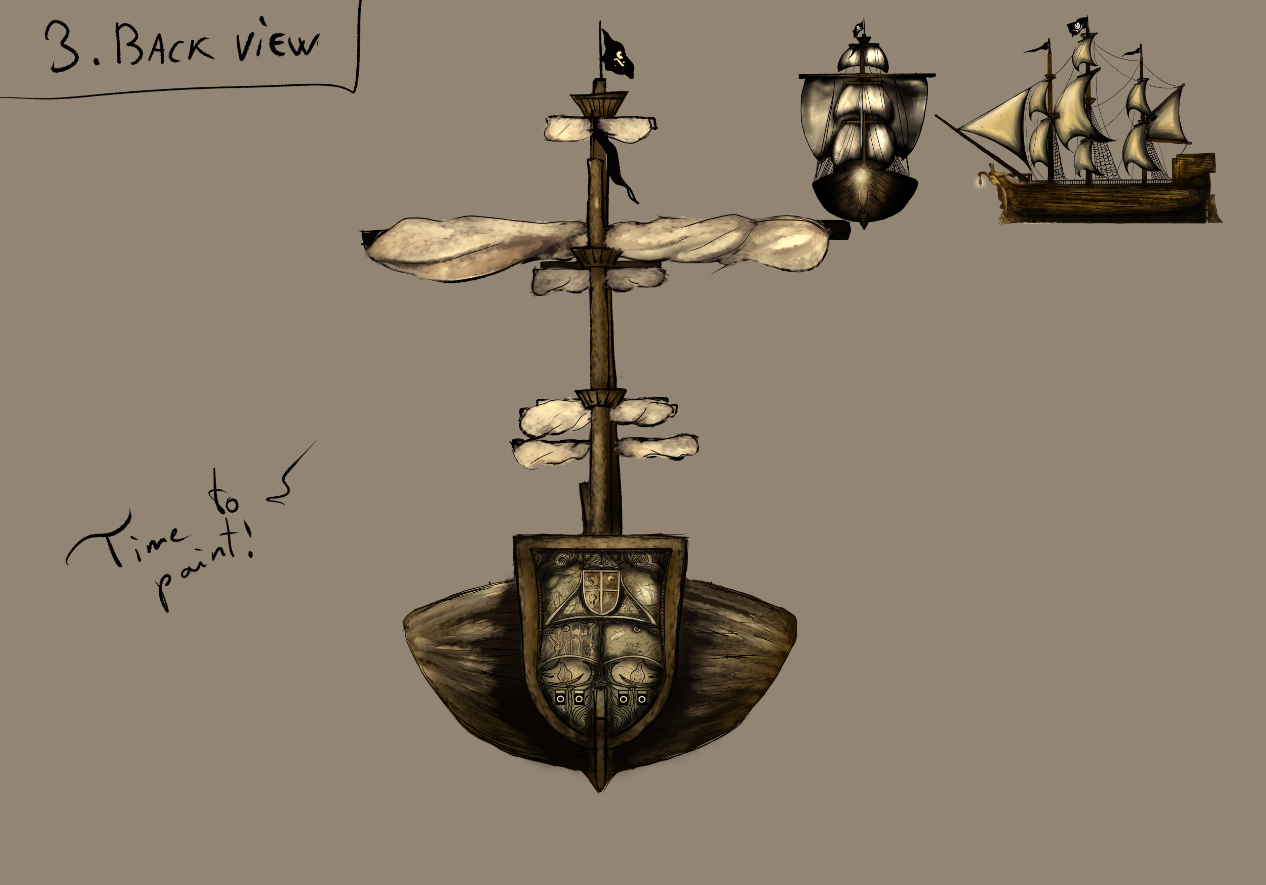
6.
Paint the ship, remember the light source cast on curves.
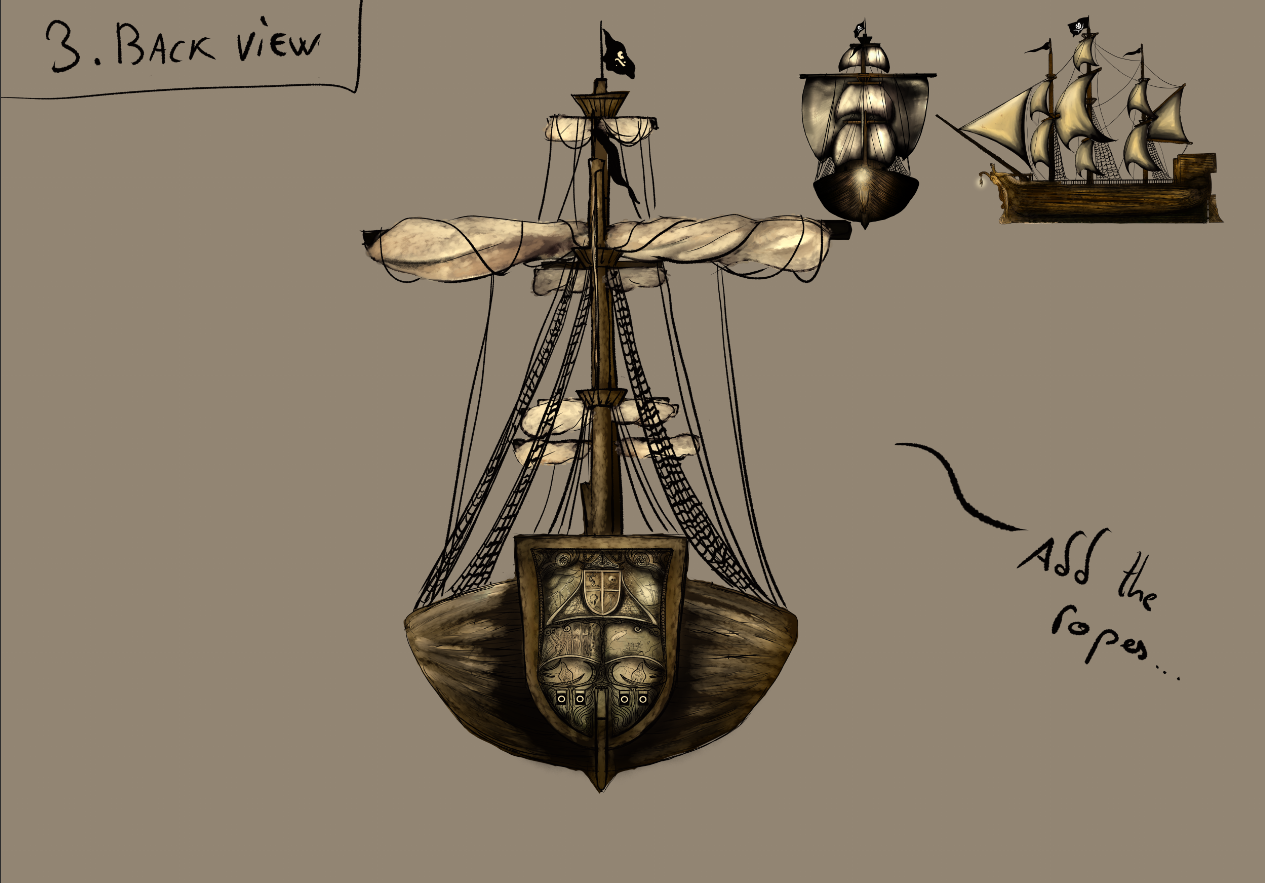
7.
Once again, the ropes become the last step. This time, because they are not hiding behind the veils.
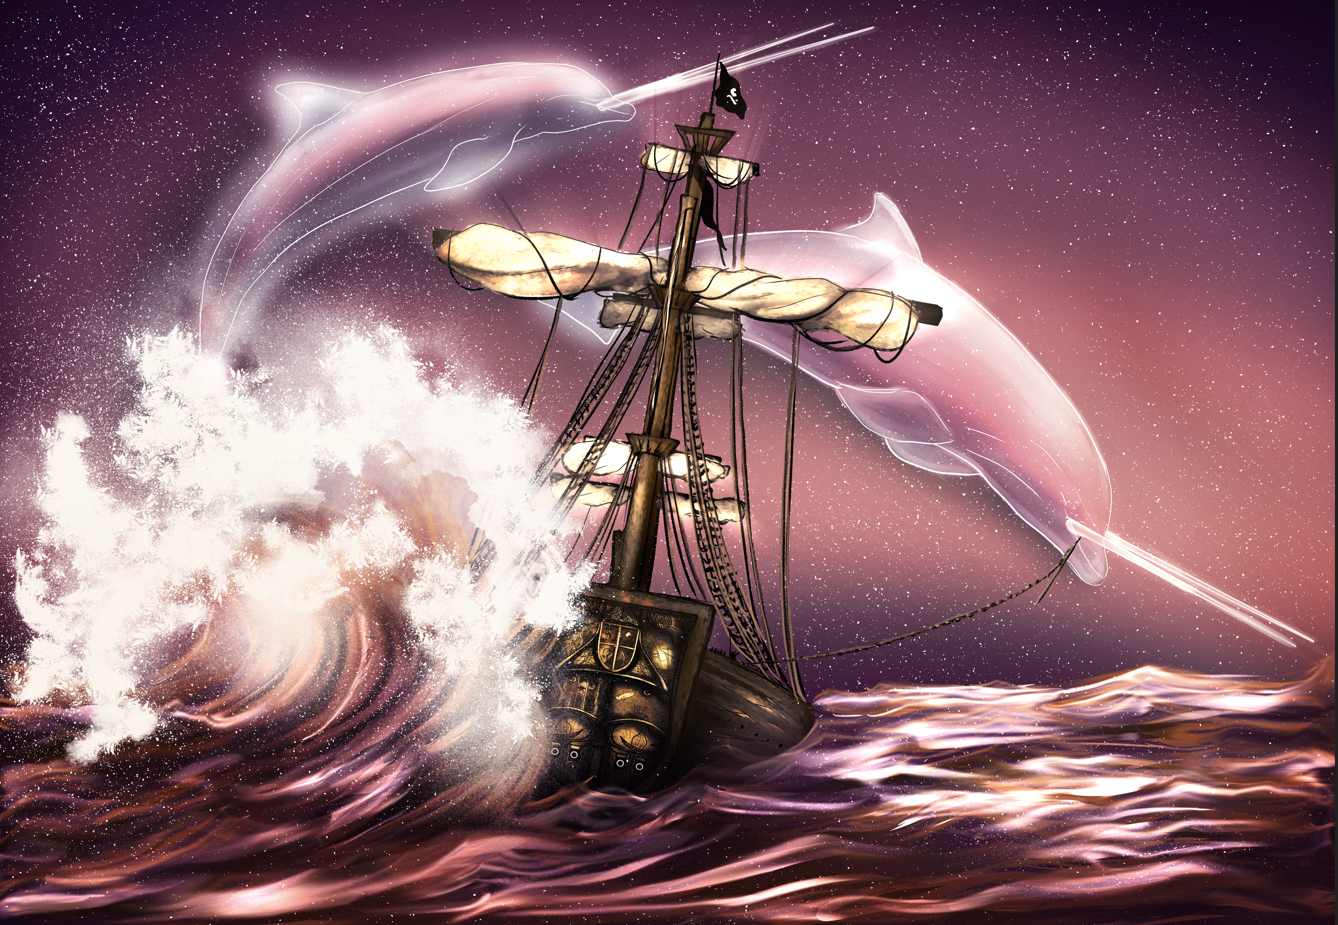
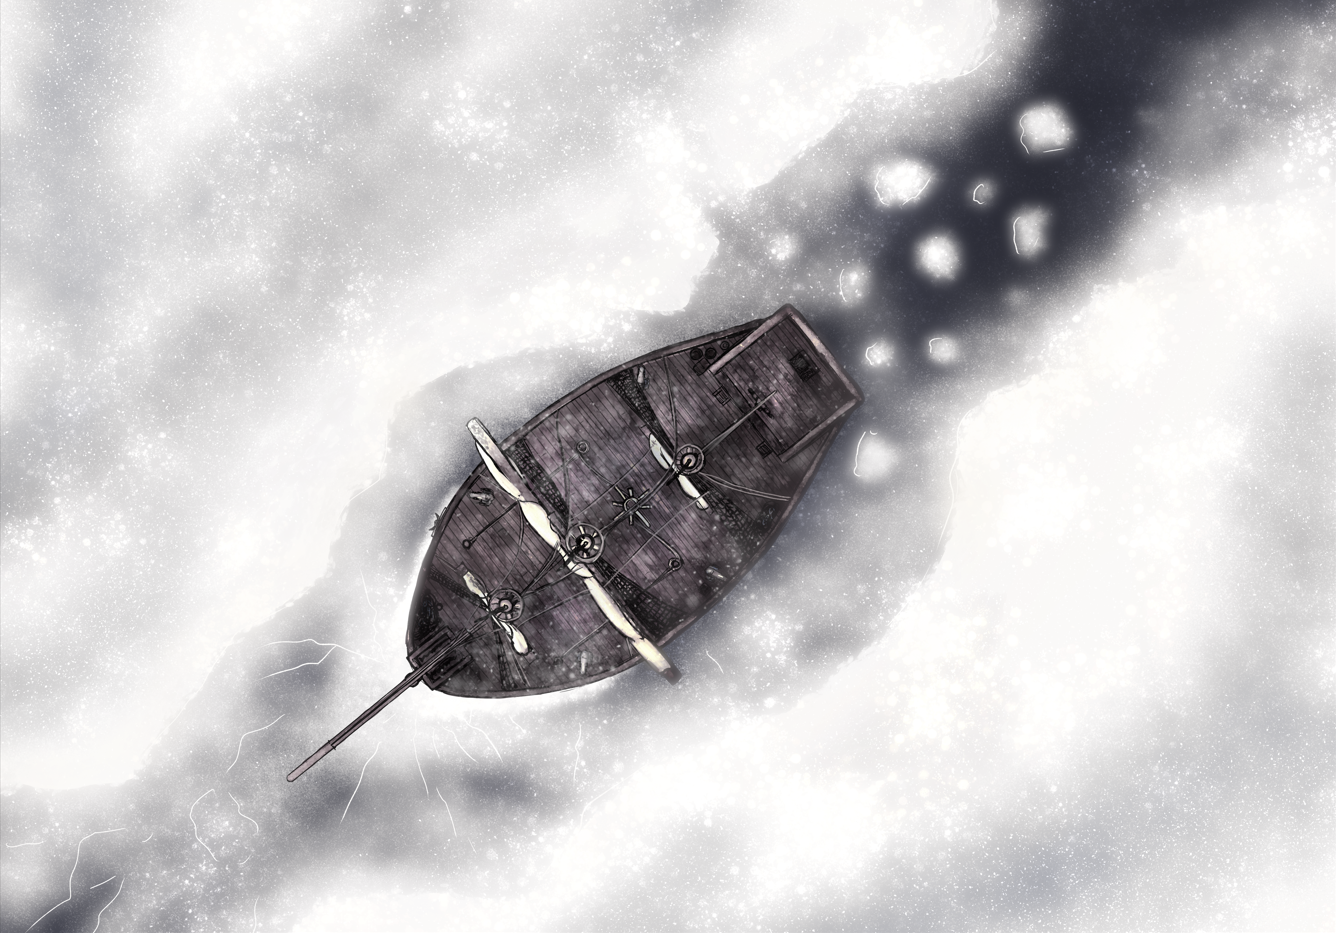
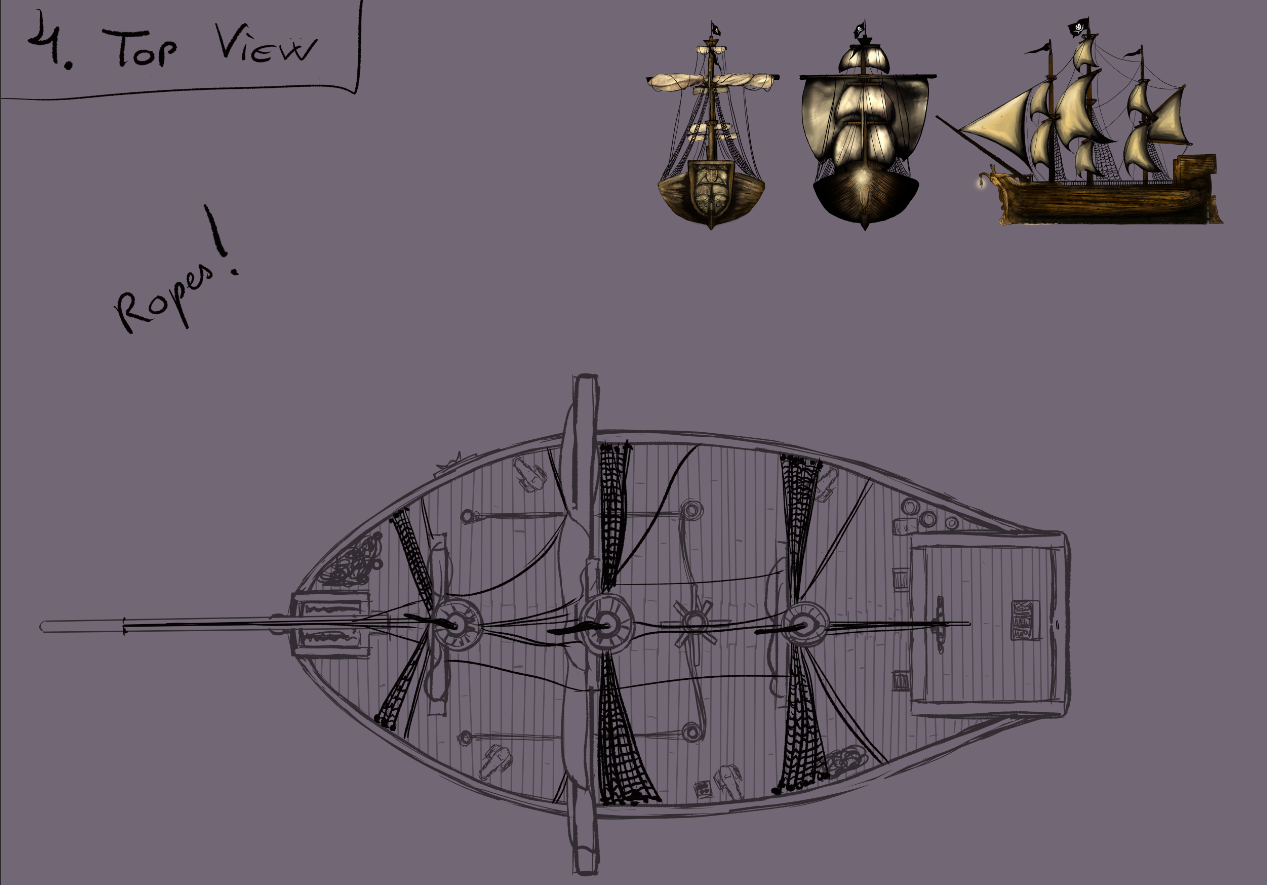
4. TOP VIEW
As a plain angle, this view is mostly used for board games and alike. A tilted version of this view is, however, used to show how small we are, compared to the world. In this tutorial, I will stick to the basic forms.
1.
Plan the shape of your boat, accordingly. Here, I used a wide curve on each side, and a little rectangle at the back.
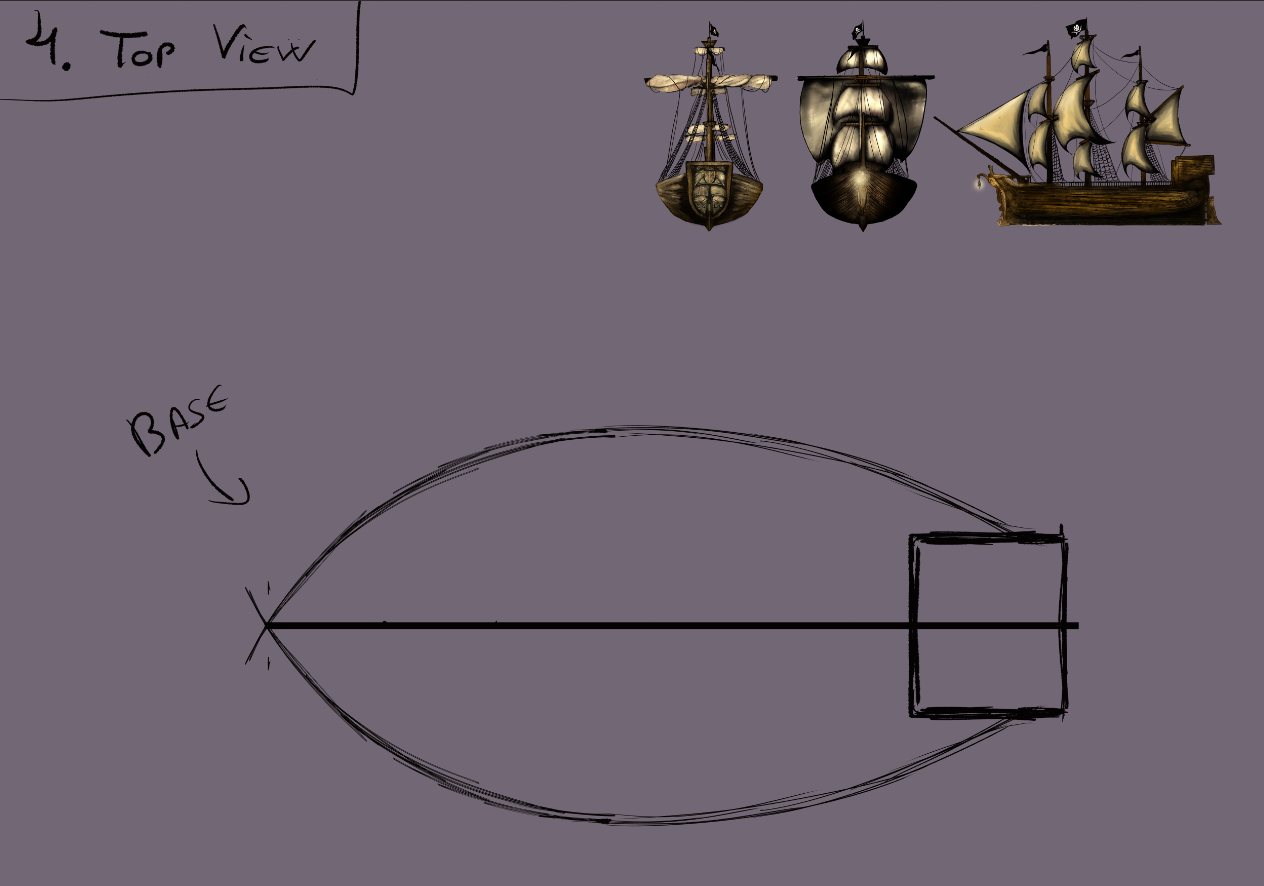
2.
Add the first details, the rims and shell basic woodwork. You may see that at the front, I cut part of the curve, to draw a small pointy piece.
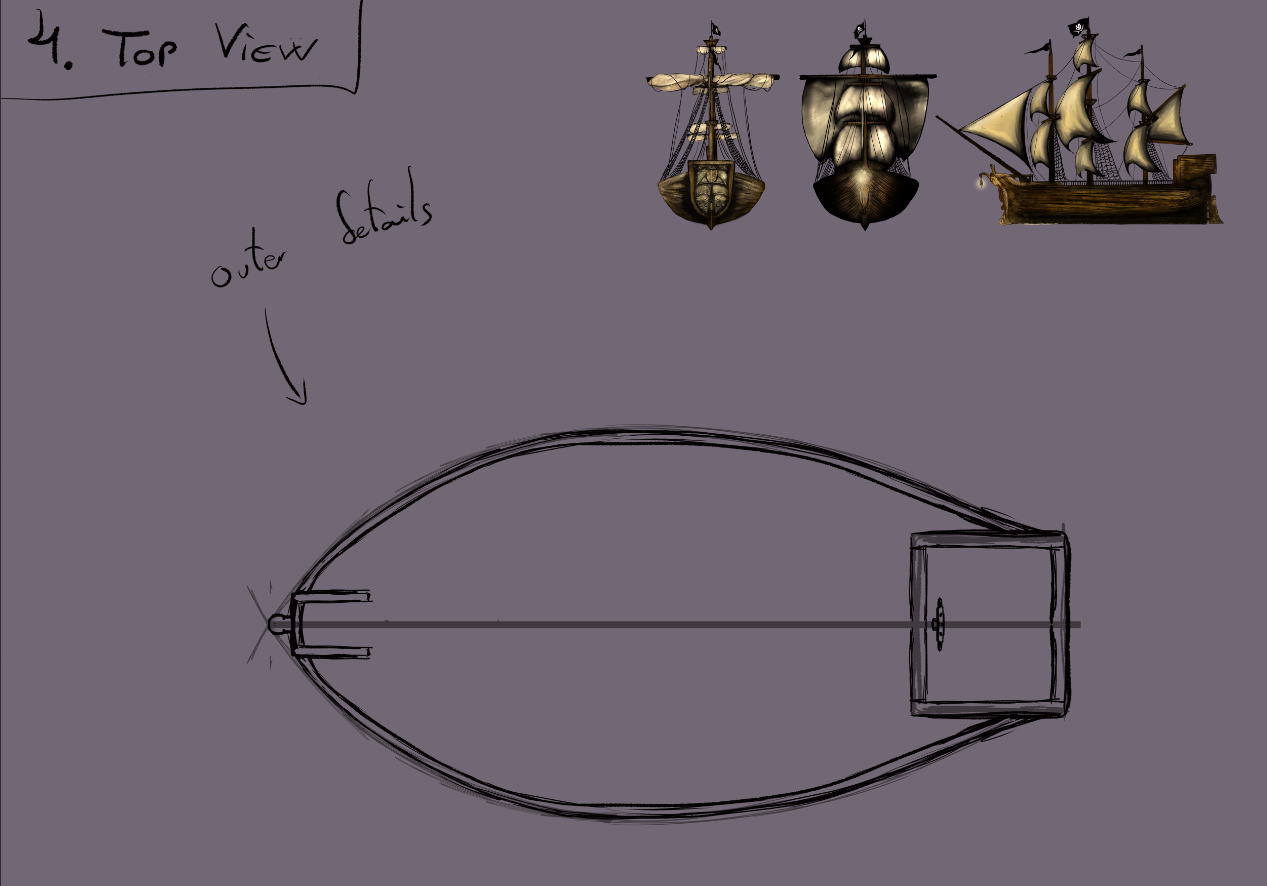
3.
Add the inner wood work! Floorboards, barrels, masts, anchor... Whatever makes your ship special, it's time to add it within! Giving little cracks and repairs can tell a lot about the ship's past.
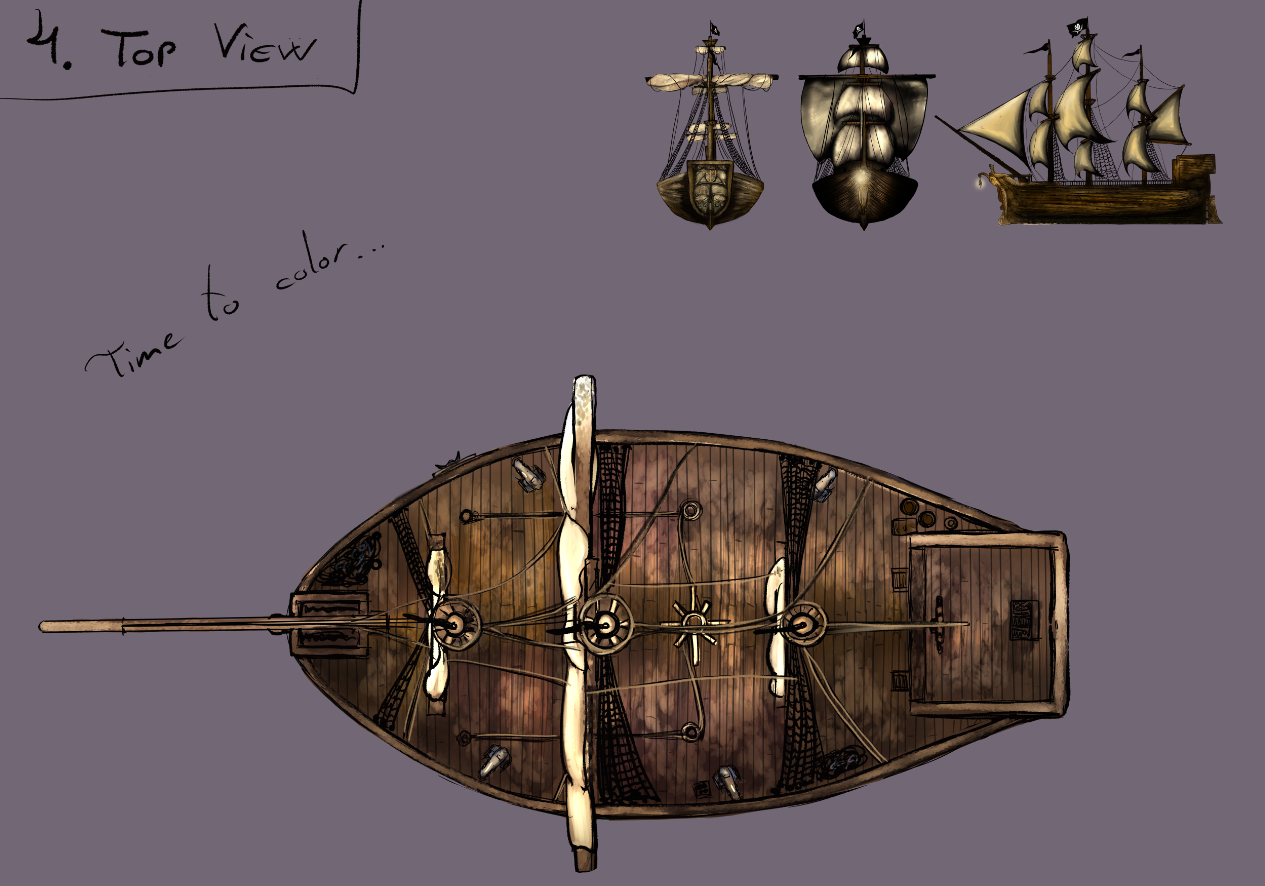
4.
Once the wood and veils are detailed, it's time to make the ropes. Draw them behind the veils, in front, and anywhere to help the veil work.
5.
Paint the ship, acknowledging also how wet or dry it is supposed to be inside. Repaired boards will usually be paler.

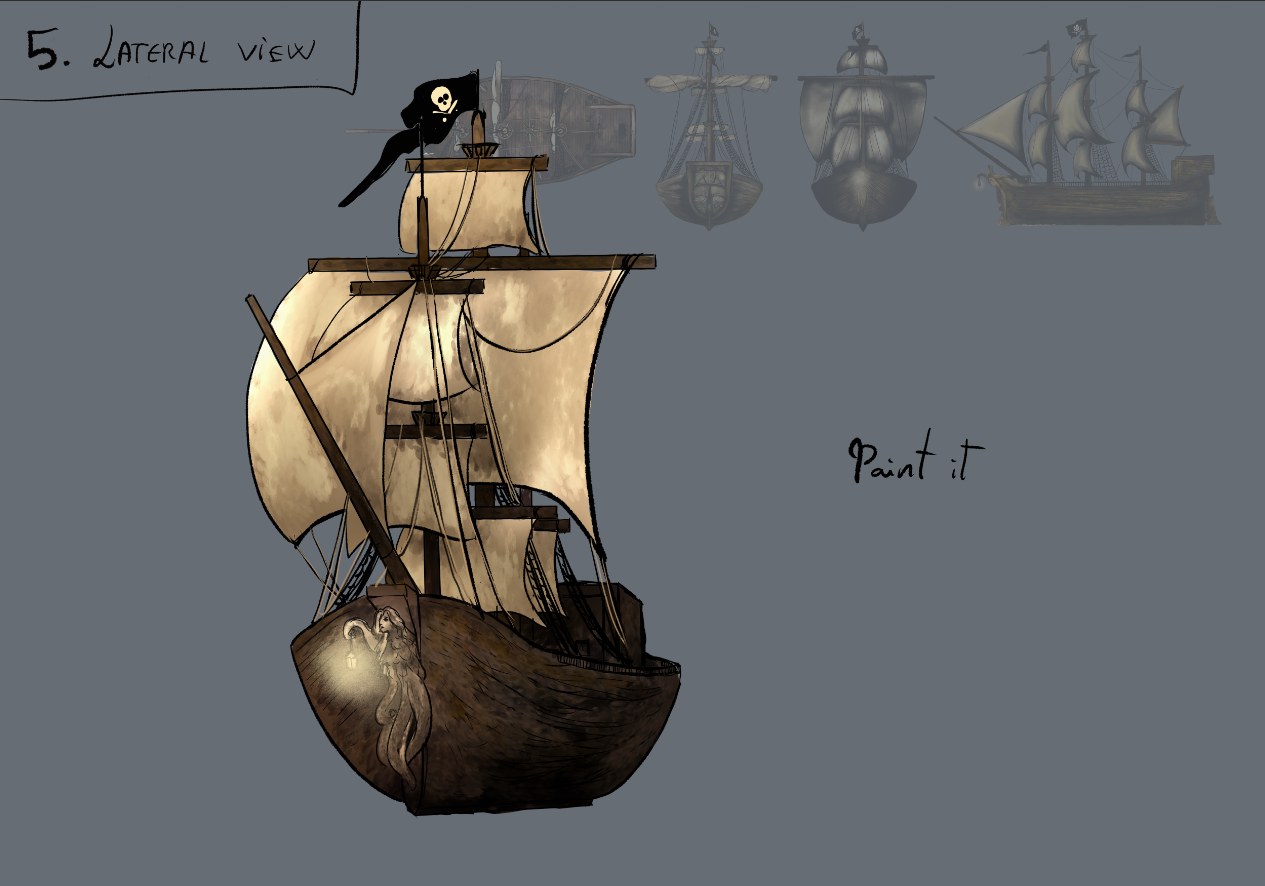
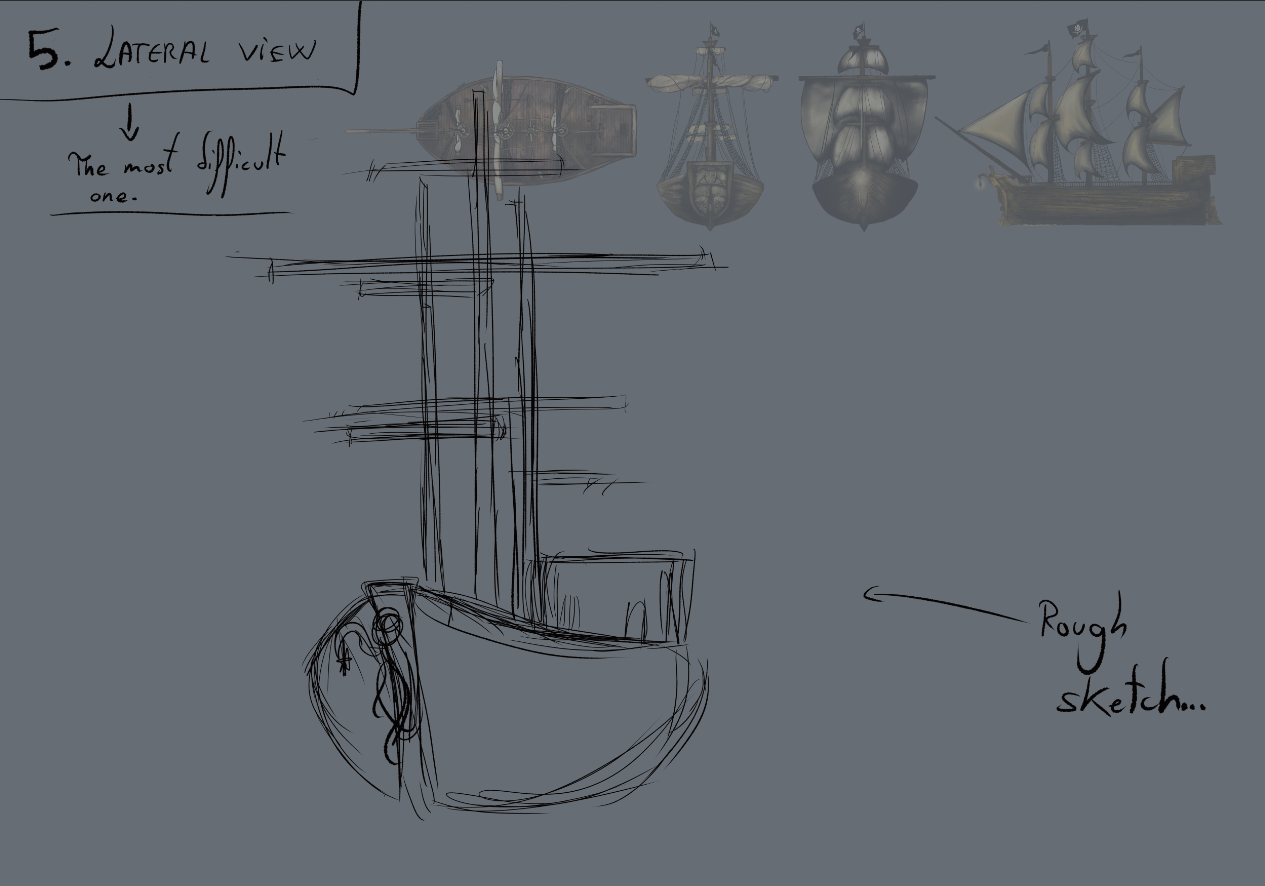
5. LATERAL VIEW
The most complicated one, by far. Perspective plays with the forms, thus, needing a slightly different process. Being also the most epic view, it's the most used one for paintings, in a way, to showcase skill, but also mightiness, and strong movements.
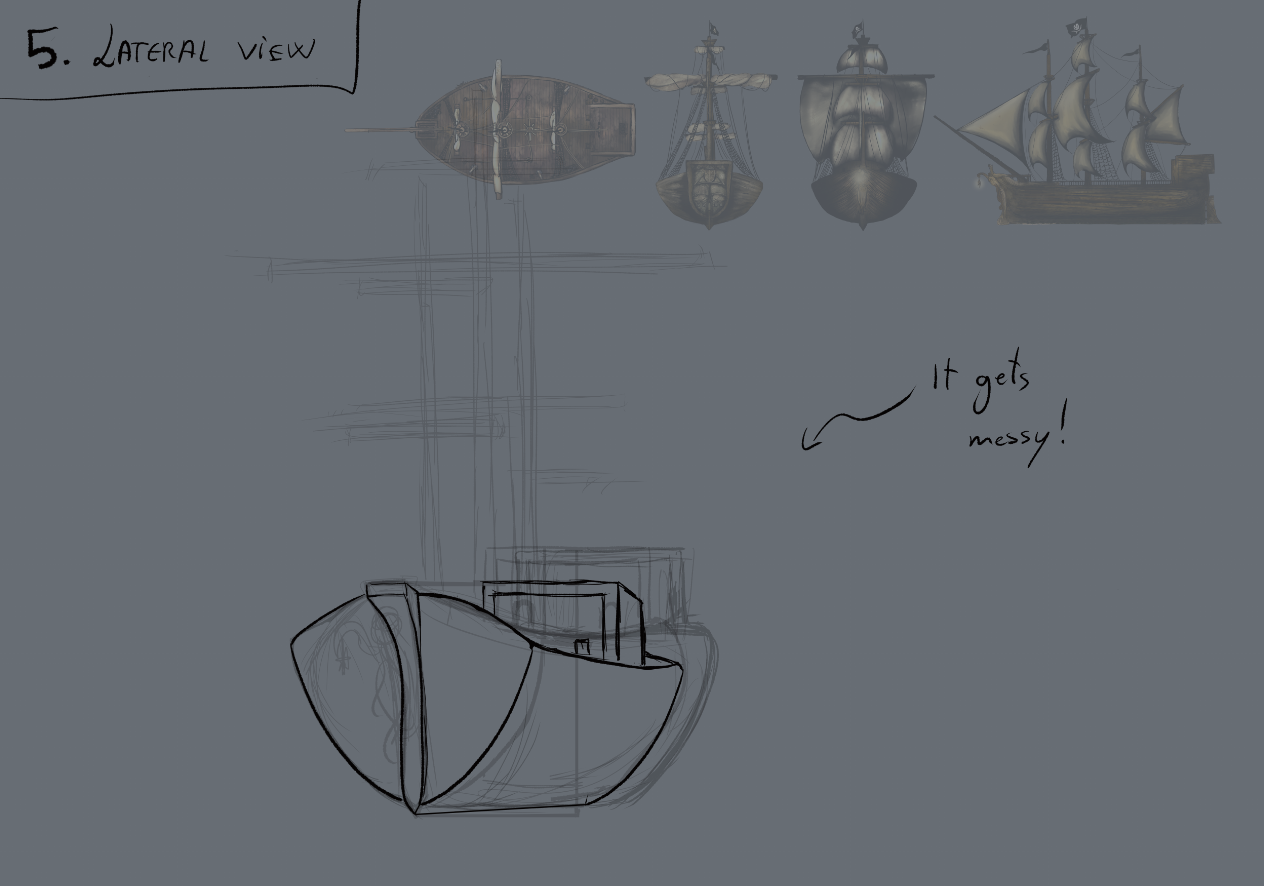
1.
Start with a very rough sketch. Use it to find perspective. Each angle will need different curves. Cage the boat, if needed, through squares and rectangles, connected. I did not use it here, to lower the amount of information given (and because it's more difficult, too).
2.
In this very case, you might need to re-draw, over and over, until the ship gets the form you aim to. Indeed, using paint could help, instead of thin lines. However, here it's more about the shapes, isolated. Polish the sketch as you go.
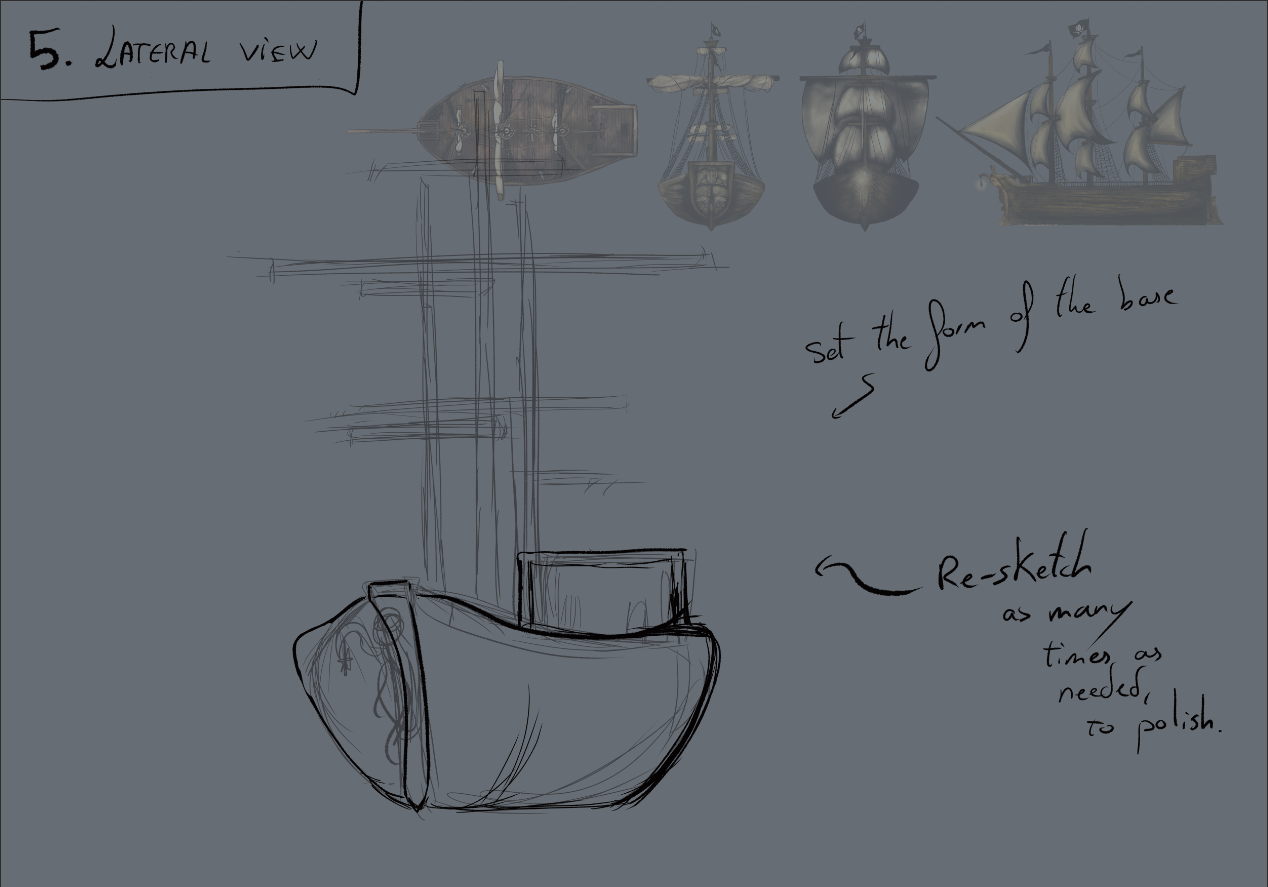
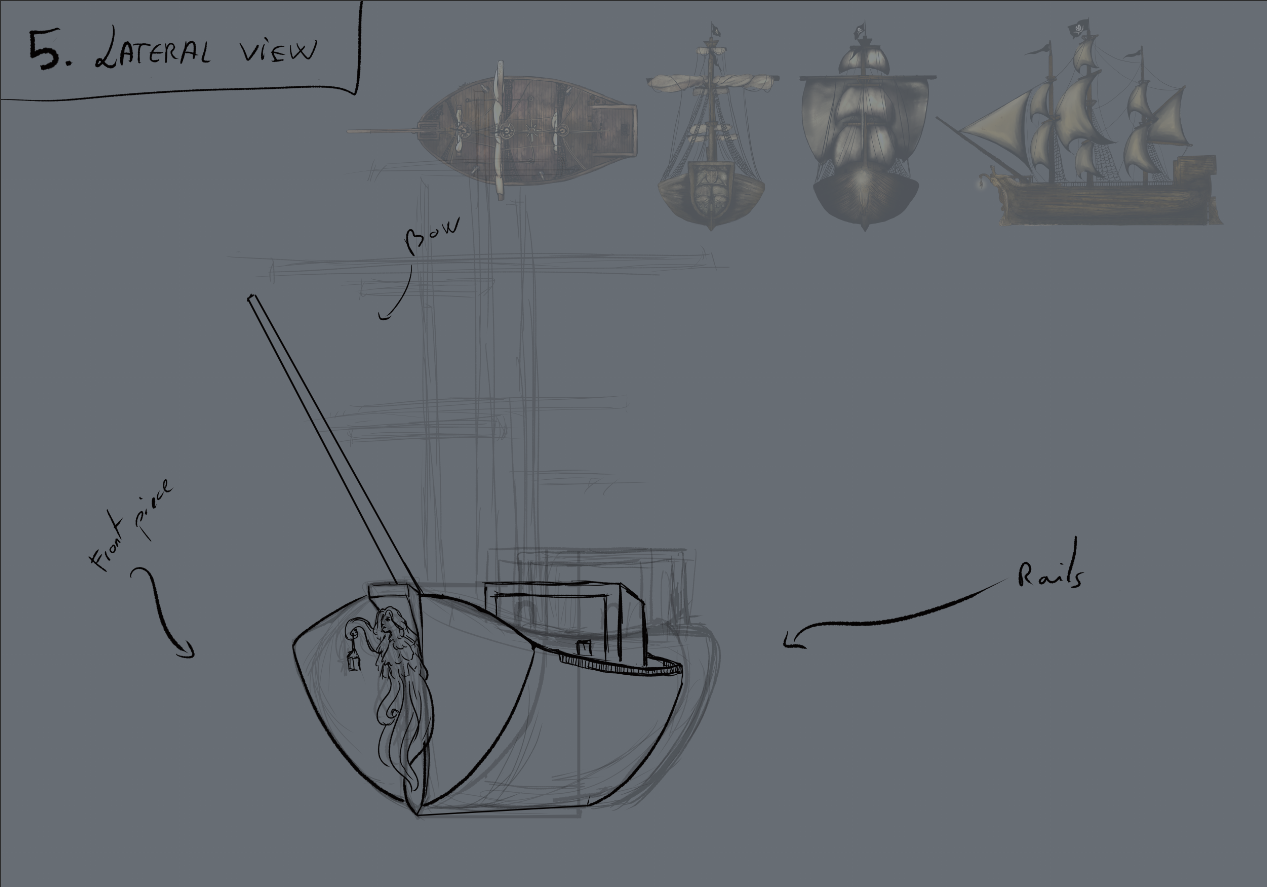
3.
Sill correcting, you may find the perspective morphing in front of your own eyes. You may try to seek the symmetry. The line on the front, right, is not a true curve, but it works to keep a visual clue.
4.
Add the bow, front piece, rails, and any other detail needed to continue.
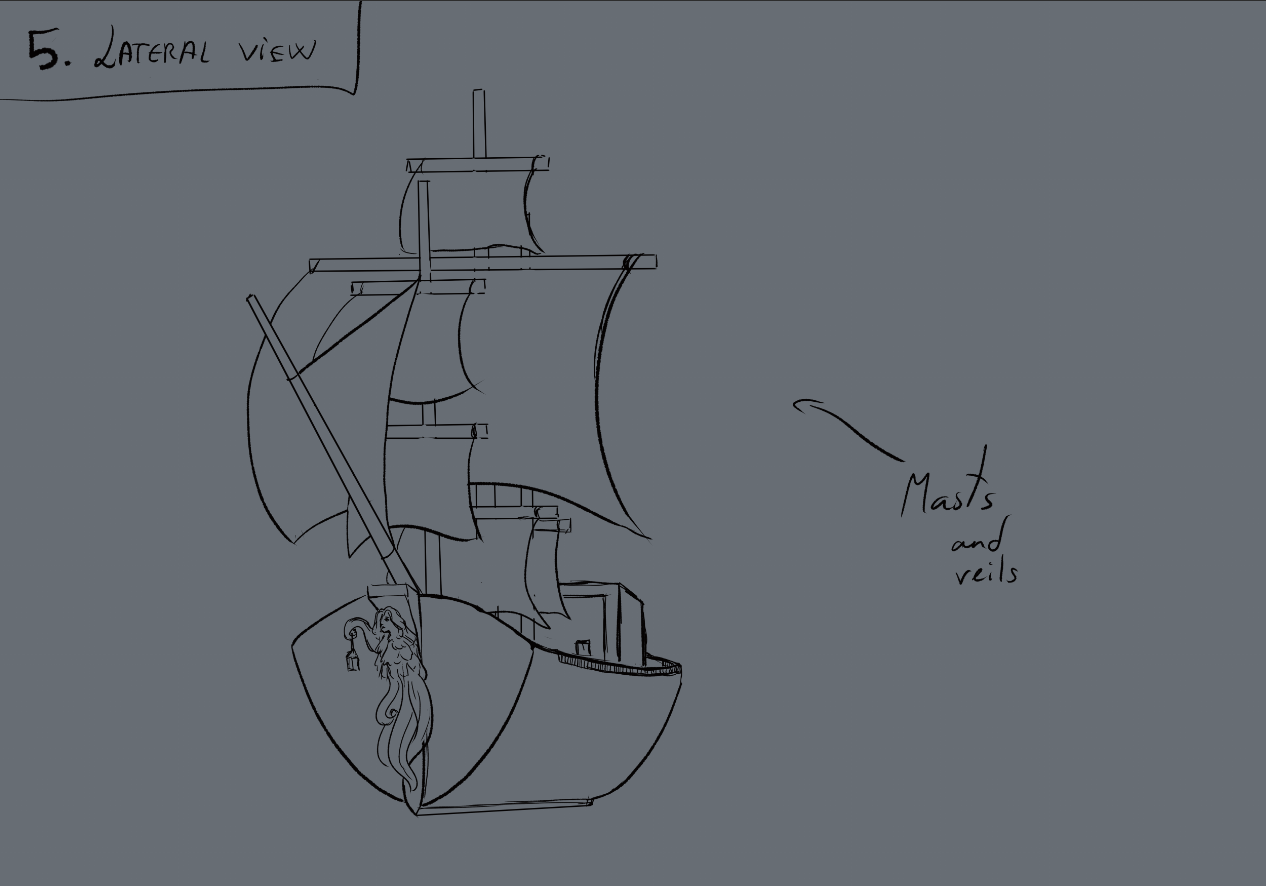
5.
When drawing the masts and veils, keep in mind the first two views of the tutorial, since you will use them, according to your angle.
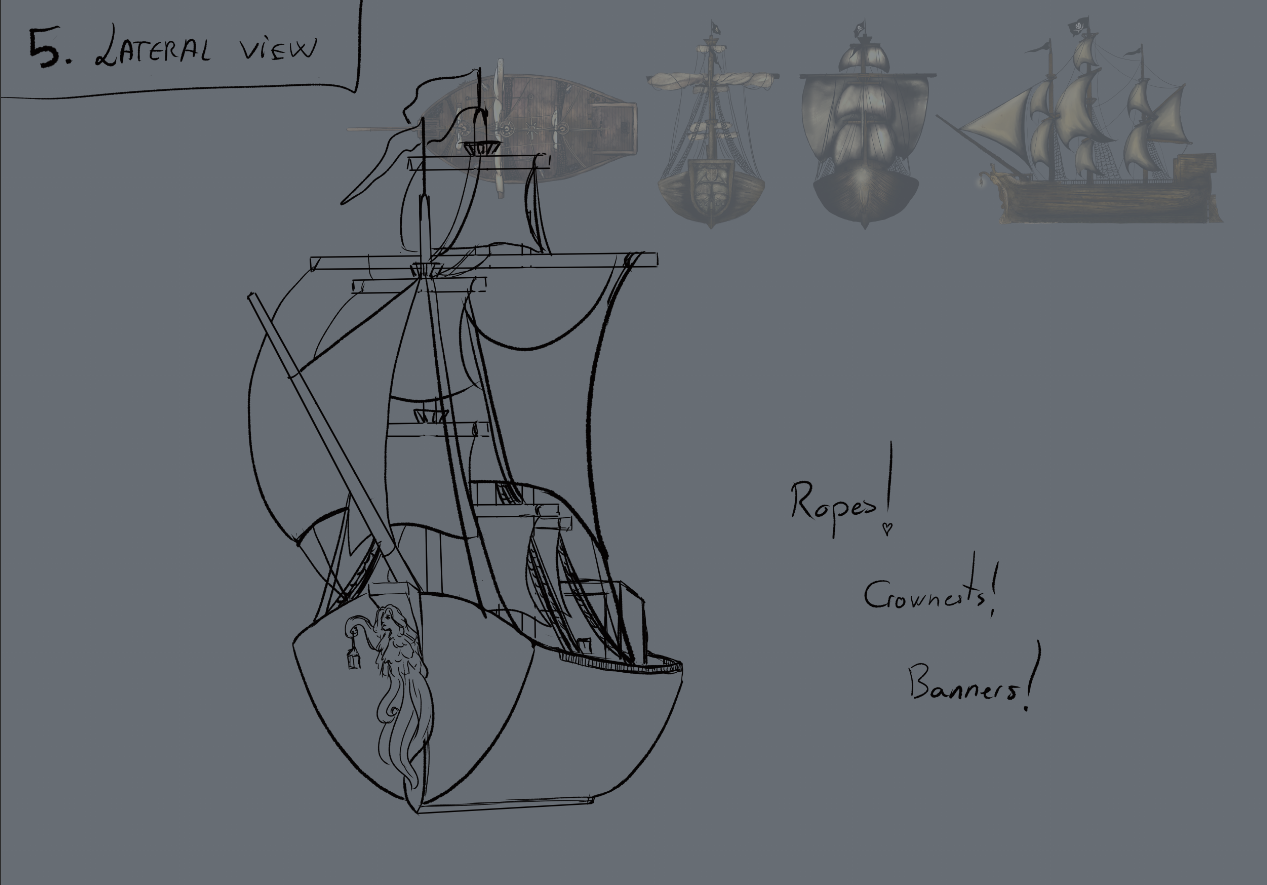
6.
Once again, the ropes and banners will become the last additions.
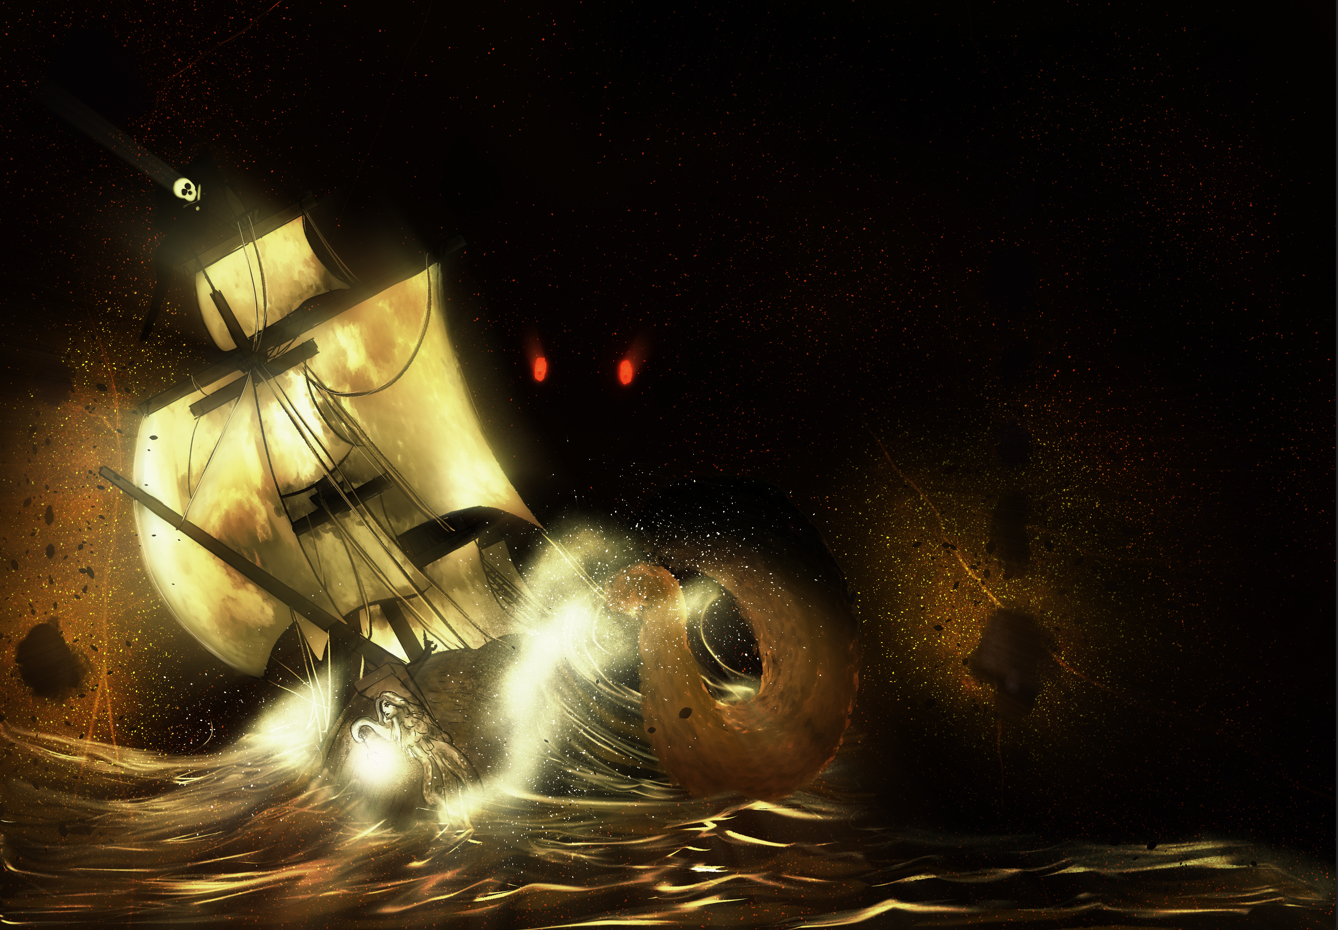
7.
Paint it, erasing any guides you had added (such the aforementioned front, right, line). Tilt accordingly, making the waves as strong as needed. The bigger, the mightier, so more tilted the ship will be.