How to make a Cake
in a few, easy steps.
Whether it's a birthday celebration, a friend party, or any event that involves food, cakes are always welcomed. But sometimes we need simplicity, rather than something extremely elaborated. Here's why I decided to make two tutorials in one. Hope both help!
Cake Tutorial 1Two Moons Cake  IngredientsChocolate bunt cake: 3 cups of flour Chocolate glaze: 1 cup of dark chocolate, chopped or chips Decoration: Raspberries Instructions- Preheat oven to 180ºC. - In a large mixing bowl, combine the flour, sugar, cocoa powder, baking soda, and salt and mix until well blended.- Add in oil, yogurt, lemon peel, and vanilla, stirring together until everything is well combined. - Grease a bunt pan with butter and fill it with the mix. Place in oven for 60 minutes. - Cool 10 minutes before inverting onto a cake plate. - Mix chocolate and coconut milk in a pot, and place it on slow fire. Add more milk, until the chocolate is liquid. Pour over the cake while the chocolate is still warm. - Add the raspberries and the blackberries on top, while the chocolate hasn't cooled down yet. |
Now that you have a nice reference, it's time to start drawing it. I will paint another cake to avoid interfering with your results. This cake was Empress Suma's 24th birthday cake.
Note to my patron: Since my 24th birthday hasn't arrived yet, don't even get the idea this is a petition. This is only canon in H'alerennae.
Cake Tutorial 2
Ingredients
Graphic tablet
Graphic pen
Drawing program
Instructions
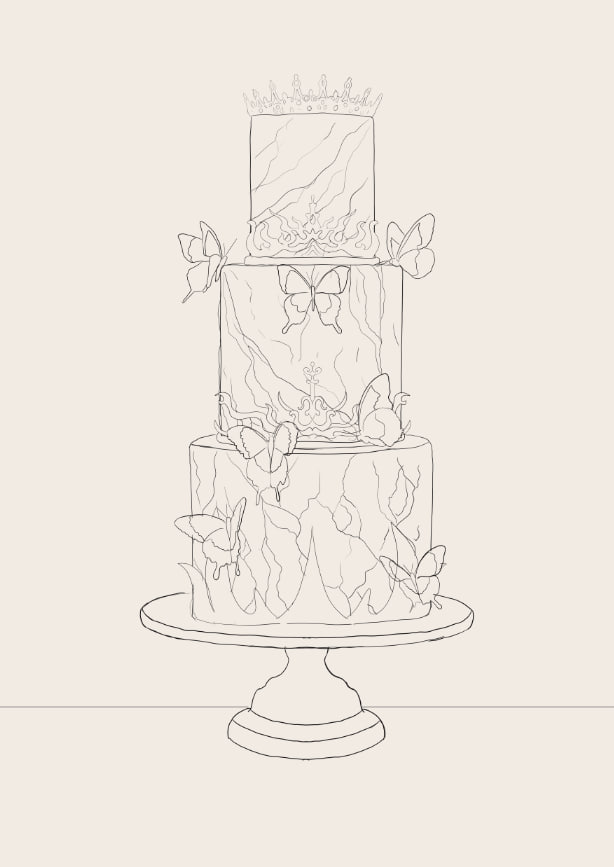
(1) First, I start with the main form. I will make a three floor cake so I can show off more details.
(2) Now, I draw some lines inside. Despite in the end they won't be visible, here you can get ideas.
(3) I add the extra details, which in this case will be butterflies and crowns.
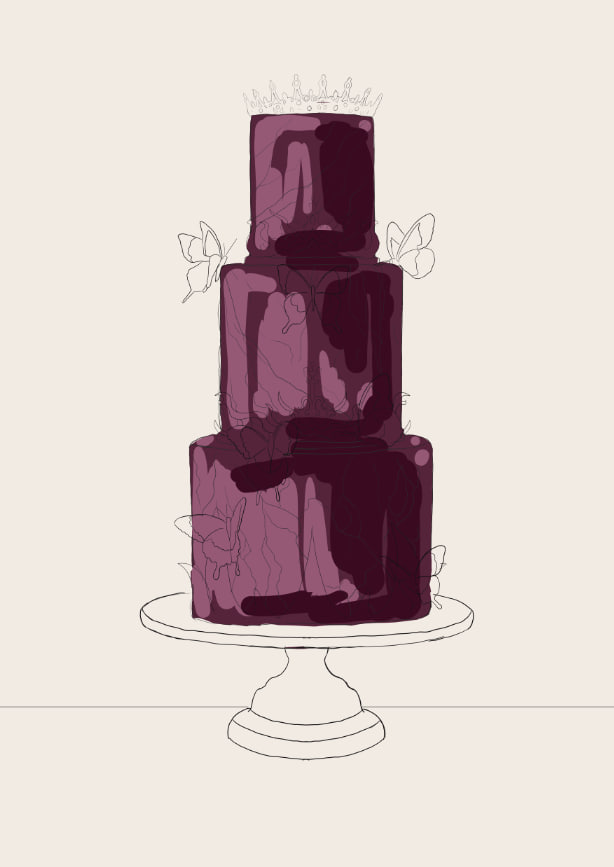

(4) The base color I choose is a grayish burgundy. I use a more contrasted, darker tone to make the shadows, and a paler, less saturated one for the lights.
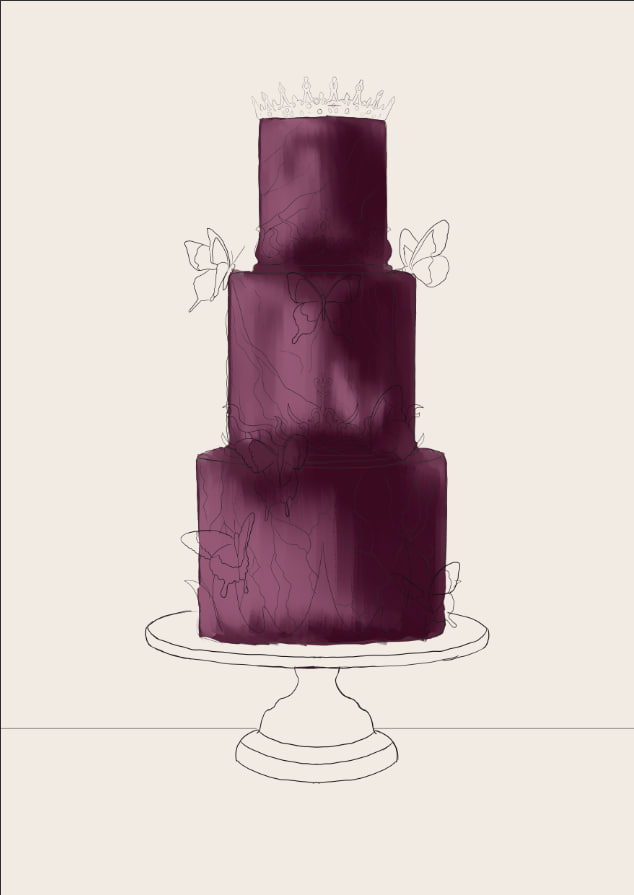
(5) I blend the colors together. Every cake is made differently, so there's gonna be cakes where the cover looks rough, others that look silky, or even painterly. I choose the silky one.
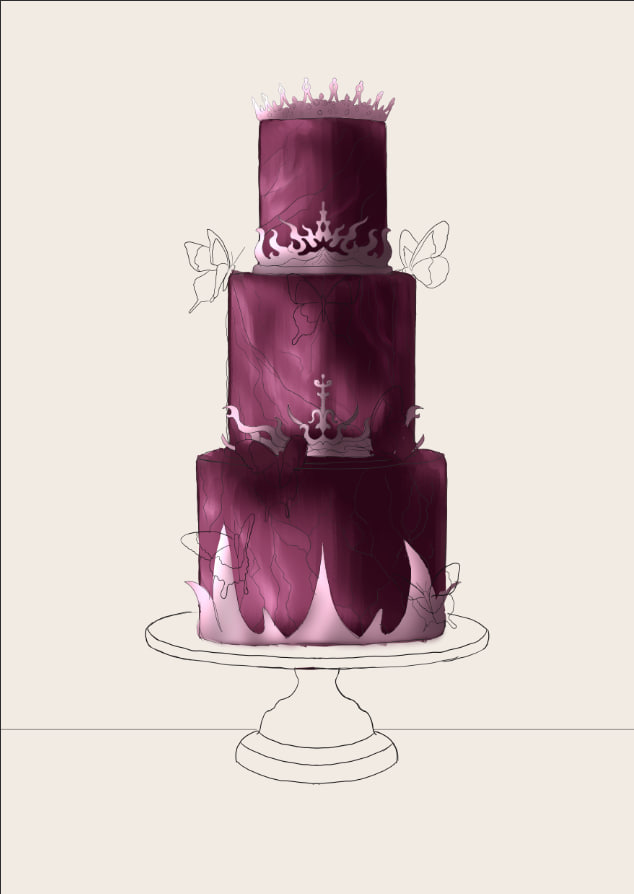
(6) Now I start with the crowns. I choose a pale hue between pink and violet. The idea is to naturally match the darkness of the cake itself, and brighten it up.
(7) For this painting, I will obey the color theory, on a triadic combination. So I choose blue for the butterflies.

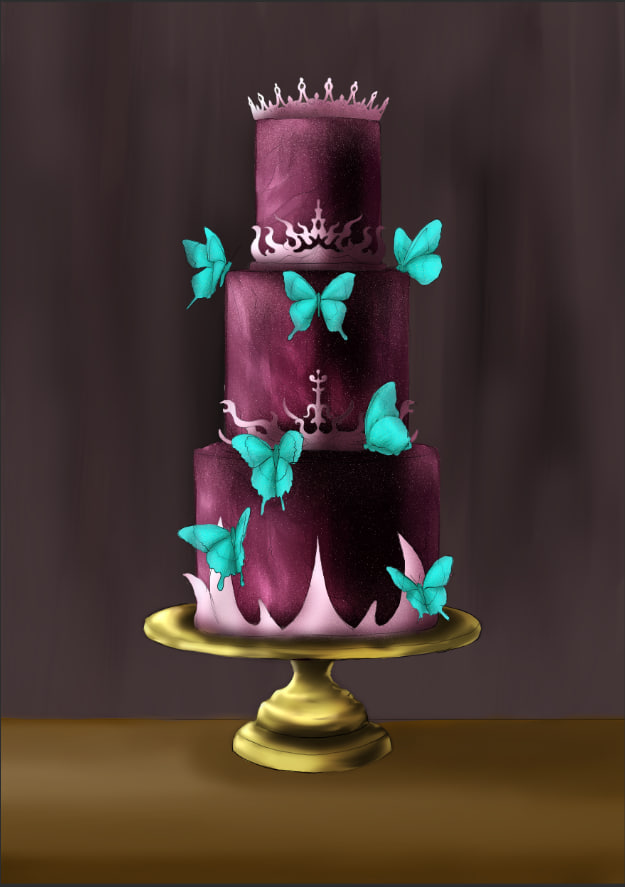
(8) Following the wheel, I use a yellow-orange tone for the plate. To have a better idea on how to pain metals, please refer to: How to paint Gold. After I finish, I use a spray brush to create a purpurine effect on the cake.
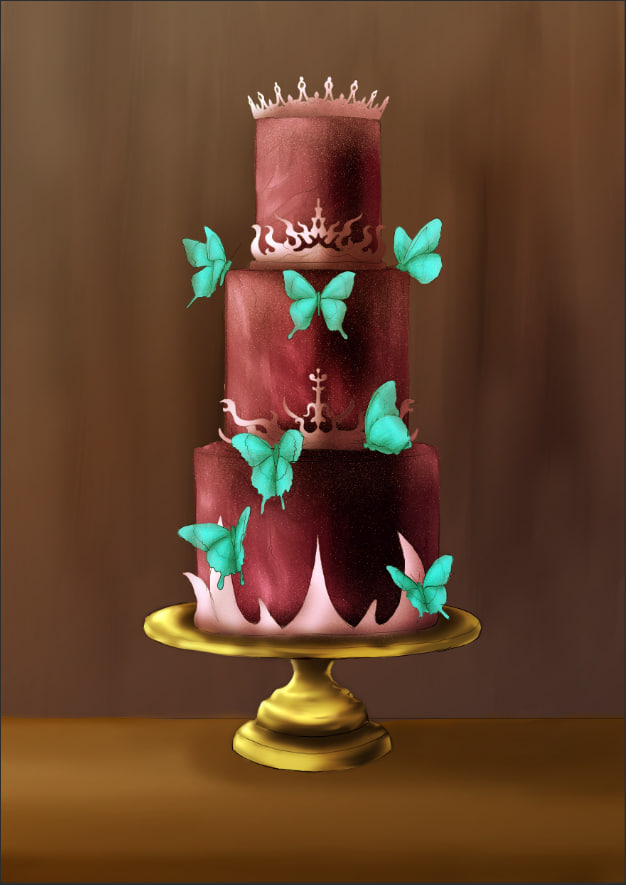
(9) To give some depth to the piece, I paint the background brown. Now the butterflies and crowns take the spotlight.
(10) I add filters on top, in hue and overlay types of layers. This is an optional step, since it's my personal choice of creating an aesthetic.