Icicle Tutorial
How to make an icicle in 10 minutes, by using Clip Studio default brushes only!
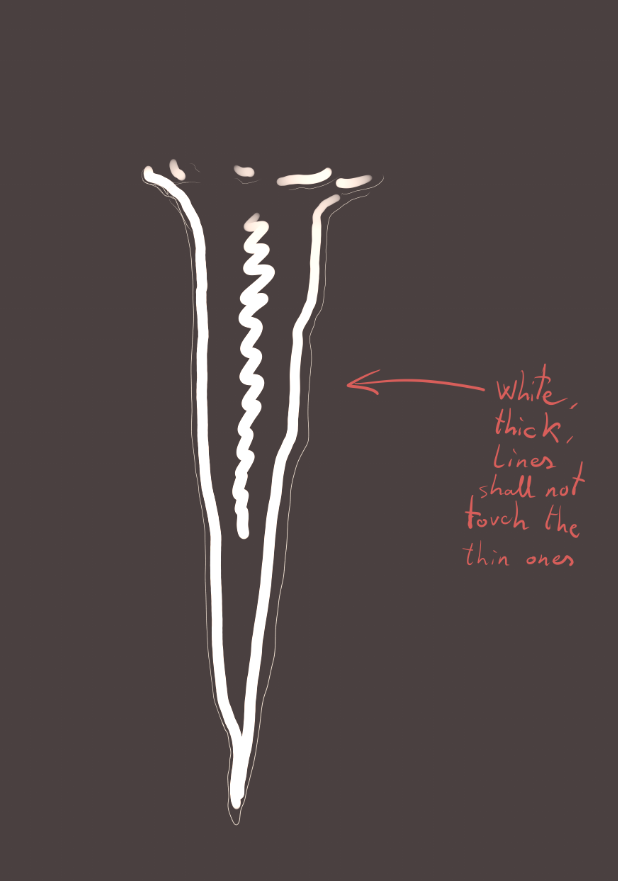
Step 1
Create a dark background. I tend to use warmer colors at the beginning of a piece, to force the colder view through it. With a very thin brush, draw the silhouette of the icicle, using a pale color. Use an uneven line, thinning from top to the bottom. Besides, do not close the gaps on the top, leave them open!
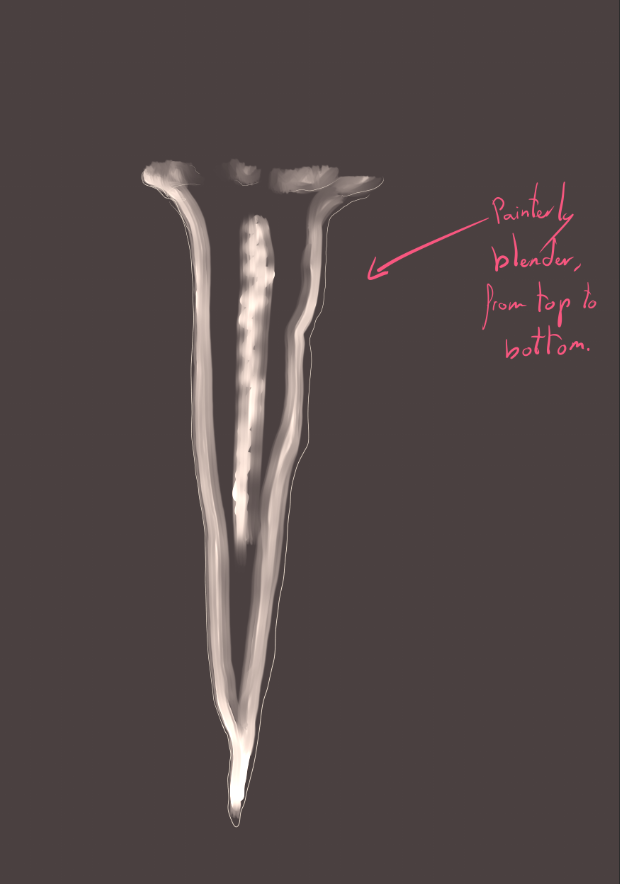
Step 2
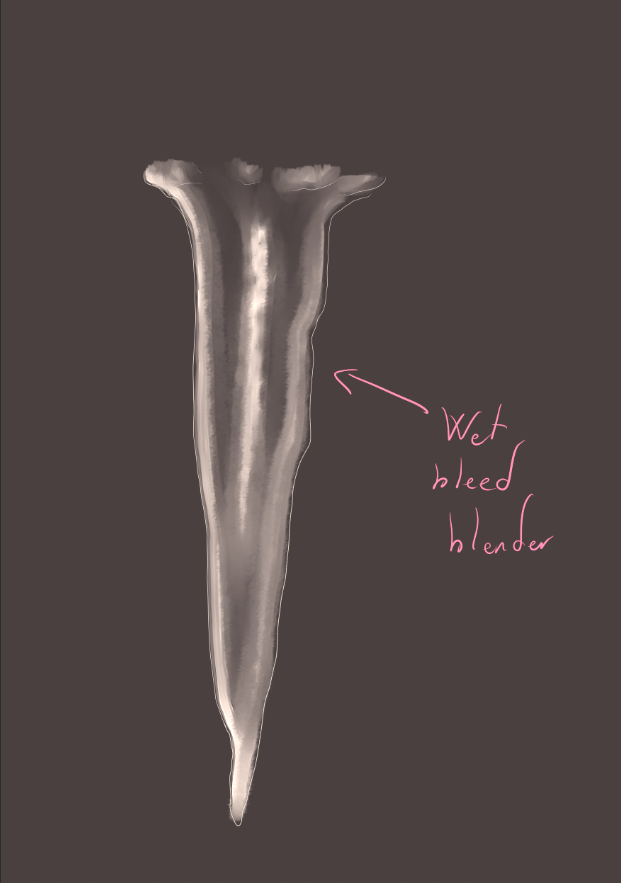
Open a new layer, below, and set it to Add (Glow). Using a thicker brush, draw a similar shape, inside the lines. Add a central line, without merging them. Once this is done, blend from top to bottom, with the Painterly Blender first. Make sure that there's still space without paint, so, by using the Wet Bleed Blender, you can fill the gaps, softly. The background should be visible.
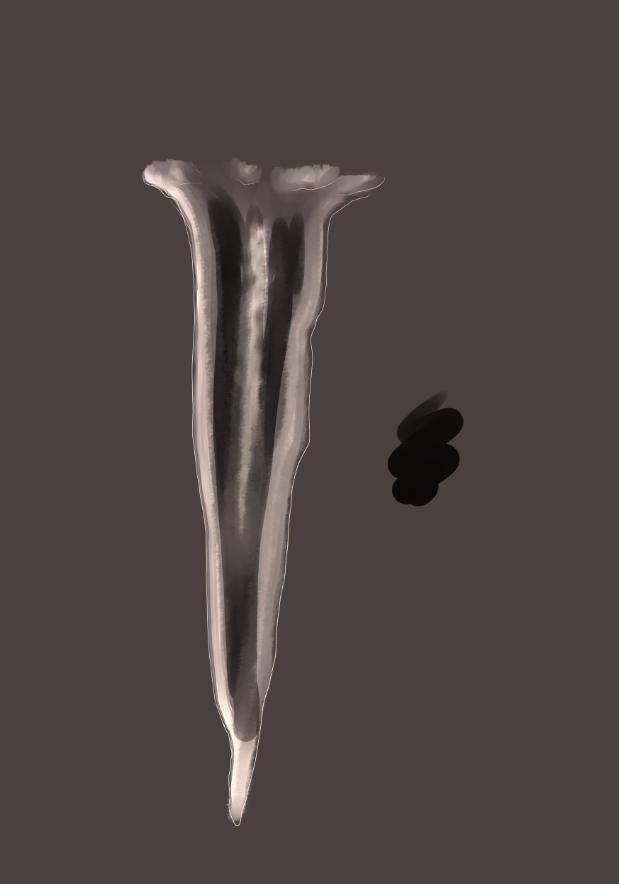
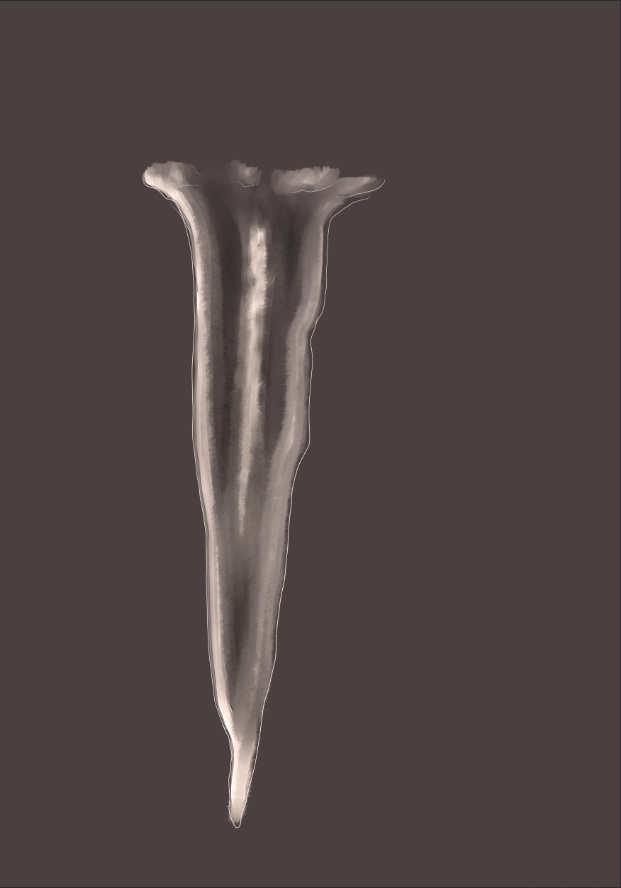
Step 3
With a new layer, below the others, set to Multiply, fill the gaps. The color choice should be similar, but darker, to the background. Now, you can blend it using the Wet Bleed Blender.
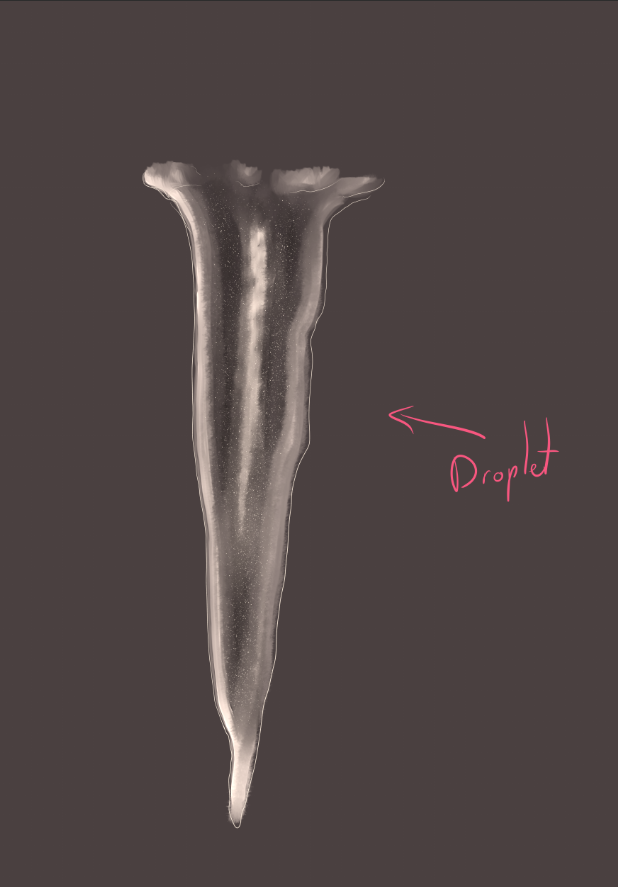
Step 4
To finish the icicle, use the Droplet brush, set to the smallest Particle size, and fill the entire figure, using a new layer on top of the rest.
Step 5
Change the color value to cold, if needed, to test the behaviour of your icicle. This is almost like mirroring the canvas, when there's no symmetry to test. Your icicle should always have a little bit of transparency, made it possible through the Multiply and Glow layers. If it's not, try to lower the opacity of such, accordingly.